# Objective
In this example we are going to convert this generic [notebook](./g-research-crypto-forecast-orig.ipynb) based on the [Kaggle G-Research Crypto Forecast](https://www.kaggle.com/competitions/g-research-crypto-forecasting/overview) competition into a Kubeflow pipeline.
The objective of this task is to correctly forecast short term returns in 14 popular cryptocurrencies.
The dataset provided contains information on historic trades for several cryptoassets, such as Bitcoin and Ethereum.
# Testing Environment
Environment:
| Name | version |
| ------------- |:-------------:|
| Kubeflow | v1.4 |
| kfp | 1.8.11 |
| kubeflow-kale | 0.6.0 |
| pip | 21.3.1 |
| kaggle | 1.5.12 |
## Section 1: Overview
1. Vanilla KFP Pipeline: Kubeflow lightweight component method
To get started, visit the Kubeflow Pipelines [documentation](https://www.kubeflow.org/docs/components/pipelines/sdk/)
to get acquainted with what pipelines are, its components, pipeline metrics and how to pass data between components in a pipeline.
There are different ways to build out a pipeline component as mentioned [here](https://www.kubeflow.org/docs/components/pipelines/sdk/build-pipeline/#building-pipeline-components).
In the following example, we are going to use the lightweight python functions based components for building our Kubeflow pipeline.
2. Kale KFP Pipeline
To get started, visit Kale's [documentation](https://docs.arrikto.com/user/kale/index.html) to get acquainted with the
Kale user interface (UI) from a Jupyter Notebook, [notebook cell annotation](https://docs.arrikto.com/user/kale/jupyterlab/annotate.html)
and how to create a machine learning pipeline using Kale.
In the following example, we are going to use the Kale JupyterLab Extension to build our Kubeflow pipeline.
## Section 2: Prepare environment for data download
1. Open your Kubeflow Cluster, create a Notebook Server and connect to it.
* Fill in your Notebook server name and leave the rest as default.
* Launch Notebook Server.
2. Download the G-research dataset using Kaggle's API. To do this, do the following:
* Login to Kaggle and click on your user profile picture.
* Click on ‘Account’.

* Under ‘Account’, navigate to the ‘API’ section.

* Click ‘Create New API token’.
* After creating a new API token, a kaggle.json file is automatically downloaded, and the json file contains the ‘api-key’ and ‘username’ needed to download the dataset.
* Create a Kubernetes secret to handle the sensitive API credentials and to prevent you from passing your credentials in plain text to the pipeline notebook.
```
!kubectl create secret generic -n kubeflow-user kaggle-secret --from-literal=username=<"username"> --from-literal=password=<"api-key">
```
* Create a secret PodDefault YAML file named `kaggle_pod.yaml` in your Kubeflow namespace.
```
apiVersion: "kubeflow.org/v1alpha1"
kind: PodDefault
metadata:
name: kaggle-secret
namespace: kubeflow-user
spec:
selector:
matchLabels:
kaggle-secret: "true"
desc: "kaggle-secret"
volumeMounts:
- name: secret-volume
mountPath: /secret/kaggle-secret
readOnly: false
volumes:
- name: secret-volume
secret:
secretName: kaggle-secret
```
* Apply the pod YAML file
`kubectl apply -f kaggle_pod.yaml`
* After successfully deploying the PodDefault, create a new Notebook Server and add the `kaggle-secret` configuration to the new Notebook Server
that runs the Kale or KFP pipeline.

## Section 3: Vanilla KFP Pipeline
### Kubeflow lightweight component method
Here, a python function is created to carry out a certain task and the python function is passed inside a kfp component method [`create_component_from_func`](https://kubeflow-pipelines.readthedocs.io/en/latest/source/kfp.components.html#kfp.components.create_component_from_func).
The different components used in this example are:
- Download data
- Load data
- Feature Engineering
- Merge Assets and Features
- Modelling
- Functions
## Kubeflow pipelines
A Kubeflow pipeline connects all components together, to create a directed acyclic graph (DAG). The kfp [`dsl.pipeline`](https://www.kubeflow.org/docs/components/pipelines/sdk/sdk-overview/) decorator was used to create a pipeline function.
The [`kfp.dsl.VolumeOp`](https://kubeflow-pipelines.readthedocs.io/en/stable/source/kfp.dsl.html#kfp.dsl.VolumeOp) method was used to create a [`PersistentVolumeClaim`](https://kubernetes.io/docs/concepts/storage/persistent-volumes/) that helps request for data storage. This storage is used to pass data between components in the pipeline.
Finally, the [`create_run_from_pipeline_func`](https://kubeflow-pipelines.readthedocs.io/en/stable/source/kfp.client.html) from the KFP SDK Client was used to submit pipeline directly from pipeline function
## To create pipeline using Vanilla KFP
1. Open your Kubeflow Cluster and do the following:
* Create a new Notebook Server
* Set the CPU specification to 8 and RAM to 16 GB

* Add the `kaggle-secret` configuration to the new Notebook Server.
2. Create a new Terminal and clone this repo. After cloning, navigate to this directory.
3. Open the [g-research-crypto-forecast-kfp](./g-research-crypto-forecast-kfp.ipynb) notebook
4. Run the g-research-crypto-forecast notebook from start to finish
5. View run details immediately after submitting pipeline.
### View Pipeline
### View Pipeline Metric

## Section 4: Kale KFP Pipeline
To create a KFP pipeline using the Kale JupyterLab extension
1. Open your Kubeflow Cluster and do the following:
* Create a new Notebook Server
* Set the CPU specification to 8 and RAM to 16 GB
* Increase the Workspace Volume to 15Gi
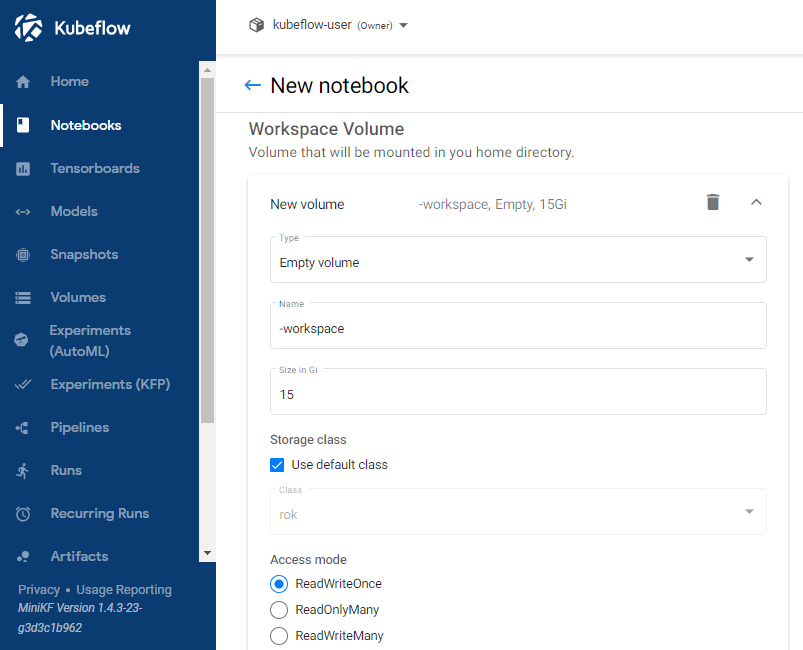
* Add the `kaggle-secret` configuration to the new Notebook Server.
2. Create a new Terminal and clone this repo. After cloning, navigate to this directory.
3. Launch the [g-research-crypto-forecast-orig.ipynb](./g-research-crypto-forecast-orig.ipynb) Notebook
4. Install the requirements.txt file. After installation, restart the kernel.
5. Enable the Kale extension in JupyterLab
6. Ensure the notebook cells are annotated with Kale tags just as it is in the [g-research-crypto-forecast-kale.ipynb](./g-research-crypto-forecast-kale.ipynb) Notebook
To fully understand the different Kale tags available, visit Kale [documentation](https://docs.arrikto.com/user/kale/jupyterlab/cell-types.html?highlight=pipeline%20metrics#annotate-pipeline-step-cells)
The following Kale tags were used in this example:
* Imports
* Pipeline Parameters
* Functions
* Pipeline Metrics
* Pipeline Step
* Skip Cell
With the use of Kale tags we define the following:
* Pipeline parameters are assigned using the "pipeline parameters" tag
* The necessary libraries that need to be used throughout the Pipeline are passed through the "imports" tag
* Notebook cells are assigned to specific Pipeline components (download data, load data, etc.) using the "pipeline step" tag
* Cell dependencies are defined between the different pipeline steps with the "depends on" flag
* Pipeline metrics are assigned using the "pipeline metrics" tag
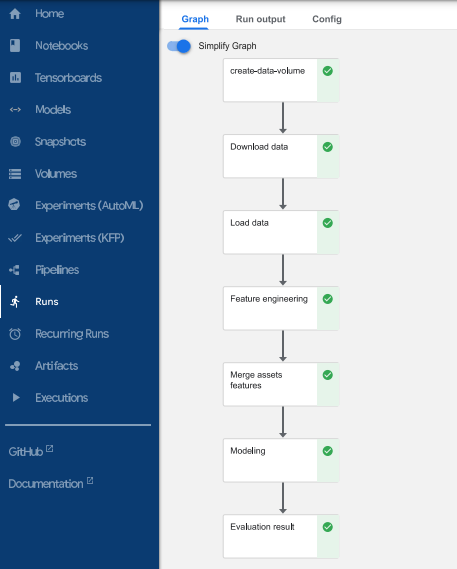
The pipeline steps created in this example:
* Download data
* Load data
* Feature Engineering
* Merge Assets and Features
* Modelling
* Evaluation
7. Compile and run the Notebook by hitting the "Compile & Run" in Kale's left panel

### View Pipeline
View Pipeline by clicking "View" in Kale's left panel


### View Pipeline Metric
