22 KiB
Install UCP for production
This page explains how to install Docker Universal Control Plane (UCP) on a production environment. A Docker UCP installation, consists of:
- A controller node where UCP is running,
- Replicas of the controller node, for high-availability,
- One or more nodes used to run your containers.
The controller node can serve as a controller and also run your containers. These instructions show you how to install both a controller and a node. It contains the following sections:
- Step 1: Prepare your installation
- Step 2: Configure your network for UCP
- Step 3: Install Docker CS Engine on each node
- Step 4: Create user-named volumes
- Step 5: Customize the CA used
- Step 6: Install the UCP controller
- Step 7: License your installation
- Step 8: Add controller replicas to the UCP cluster
- Step 9: Add more nodes to the UCP cluster
- Step 10: Set up certificates for the Docker CLI
- Disable collection of usage metrics
- Where to go next
About these installation instructions
These installation instructions were written using Ubuntu 14.0.3 running on Amazon AWS, with Elastic IPs configured for all the hosts.
If you're installing UCP on another operating system, the paths and commands might differ.
Step 1: Prepare your installation
Before installing UCP, read the Plan a production installation guide. If you haven't read the planning guide stop here, and go read it first. There you'll find more information about the architecture of UCP, and the requirements to install UCP for production.
The UCP installation consists of using the Docker Engine CLI to run the ucp
tool. The ucp tool is a Docker image that can run subcommands like install
to install UCP on a node, or join to join a node to a UCP cluster.
The general format of these commands is:
| Docker client | run command with options | ucp image | Subcommand with options |
|---|---|---|---|
docker |
run --rm -it |
docker/ucp |
install --help |
docker |
run --rm -it |
docker/ucp |
join --help |
docker |
run --rm -it |
docker/ucp |
uninstall --help |
You can use the ucp tool interactively, by passing them the -i option, or
non-interactively, by passing command-line options. This guide uses the
interactive version.
To list all the possible subcommands for the ucp tool, use:
$ docker run --rm -it docker/ucp --help
Step 2: Configure your network for UCP
Before installing UCP, you need to make sure all nodes in the cluster can communicate. Configure your network to make sure these ports are open:
| Hosts | Direction | Port | Purpose |
|---|---|---|---|
| controller, replicas | in | 443 (configurable) | web app and CLI client access to UCP. |
| controller, replicas | in | 2376 (configurable) | swarm manager accepts requests from UCP controller. |
| controller, replicas, nodes | in | 2375 | heartbeat for nodes, to ensure they are running. |
| controller, replicas, nodes | in | 12376 | proxy for TLS, provides access to UCP, Swarm, and Engine. |
| controller, replicas | in | 12379 | internal node configuration, cluster configuration, and HA. |
| controller, replicas | in | 12380 | internal node configuration, cluster configuration, and HA. |
| controller | in | 12381 | proxy for TLS, provides access to UCP. |
| controller | in | 12382 | manages TLS and requests from swarm manager. |
| controller, replicas | out | 80 | send anonymous usage reports to Docker. |
Some of the ports used, are customizable. Check the UCP install command reference for more information on this. This guide uses the default ports.
Step 3: Install Docker CS Engine on each node
UCP requires you to install Docker CS Engine 1.10 or above on all nodes of your UCP cluster, including the controller node.
For each node, follow the Docker CS Engine installation instructions for your particular operating system:
Step 4: Customize user-named volumes (optional)
UCP uses named volumes to persist user data:
| Volume name | Data |
|---|---|
| ucp-client-root-ca | The certificate and key for the UCP root CA. Do not create this volume if you are using your own certificates. |
| ucp-cluster-root-ca | The certificate and key for the Swarm root CA. |
| ucp-controller-server-certs | The controller certificates for the UCP controllers web server. |
| ucp-node-certs | The Swarm certificates for the current node (repeated on every node in the cluster). |
| ucp-kv-certs | The Swarm KV client certificates for the current node (repeated on every node in the cluster). |
| ucp-controller-client-certs | The UCP Controller Swarm client certificates for the current node. |
| ucp-kv | Key value store persistence. |
The ucp install command creates these volumes for you with the default
volume driver and flags.
If you want to use custom volume drivers, create these named-volumes before
installing UCP.
Step 5: Customize the CA used (optional)
To protect your UCP cluster against unauthorized access, all components of the cluster use mutual TLS. That way, for two components to talk, both need to identify using certificates.
For this, UCP uses two different root Certificate Authorities:
- One CA is used to secure and authenticate the communications between users and UCP,
- Another CA is used to secure the communications between all nodes that are part of your UCP cluster.
All this is done automatically when installing UCP.
You can also customize UCP to use certificates signed by an external Certificate Authority, for the UCP controller. That way you can use a certificate from a CA that your browsers and client tools already trust.
To install UCP with your own external root CA:
-
Log into the machine where you intend to install UCP.
-
Make sure you have created a named volume called
ucp-controller-server-certs. -
Add the following files to the volume's top-level directory:
File Description ca.pem Your Root CA Certificate chain (including any intermediaries). cert.pem Your signed UCP controller certificate. key.pem Your UCP controller private key.
Step 6: Install the UCP controller
During UCP installation, you will be prompted for the following information:
- A password to use for the UCP
adminaccount. - At least one Subject Alternative Name (SAN). This is the IP address or fully-qualified domain name where you can reach this controller.
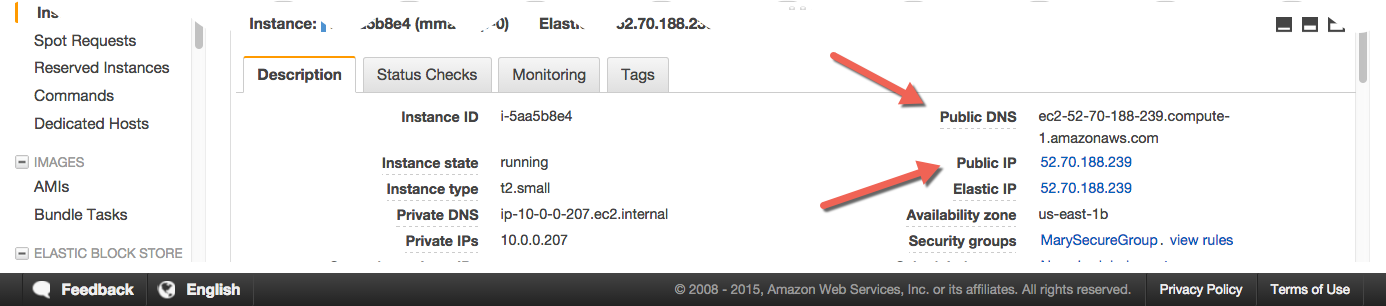
Be sure to have this information at hand before starting the installation. If you're installing UCP on a cloud provider such as AWS, make sure your instance has a public IP or hostname, as displayed below.
On the controller node, install UCP:
-
Review the options available on the
ucp installcommand.$ docker run --rm -it docker/ucp install --helpYou can also find the documentation for these option on the UCP install command reference.
-
Run the
ucpcommand interactively.$ docker run --rm -it --name ucp -v /var/run/docker.sock:/var/run/docker.sock docker/ucp install -iIf you are using server certs signed by an external CA, include the
--external-server-certoption at the end of the command.The command pulls several images from Docker Hub, and prompts you for the installation values it needs. When the installation is complete, the command asks you to log into UCP.
INFO[0053] Login to UCP at https://52.70.188.239:443
Step 7: License your installation
Now that your UCP controller is installed, download and apply the license to your installation:
-
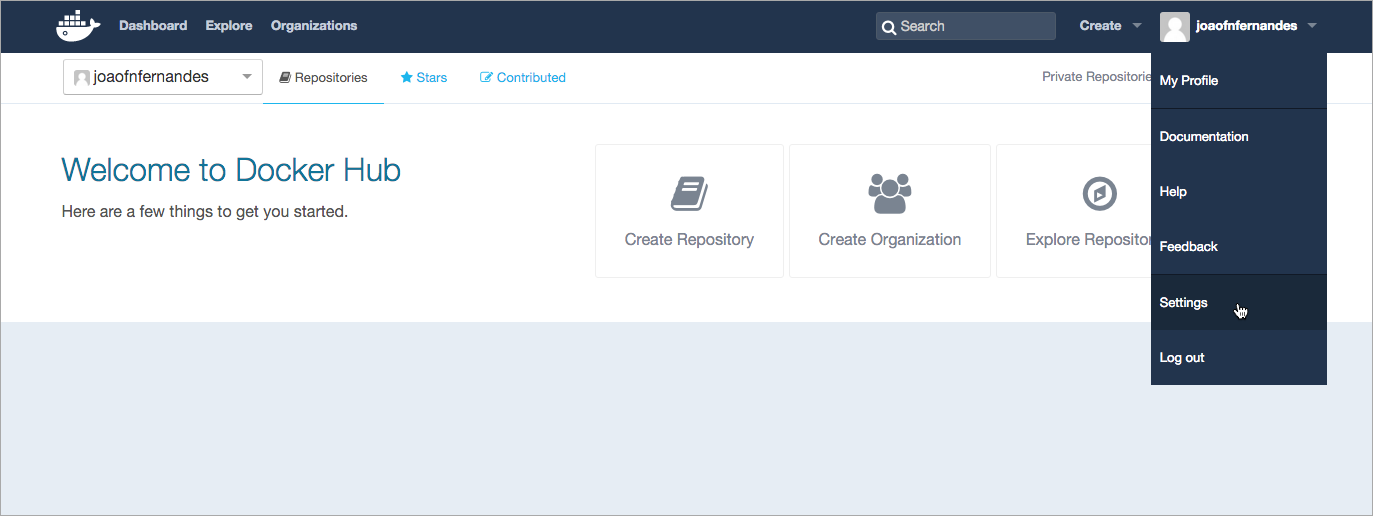
Navigate to Docker Hub to download your license. On the top-right menu, choose Settings.
-
Navigate to the Licenses tab.
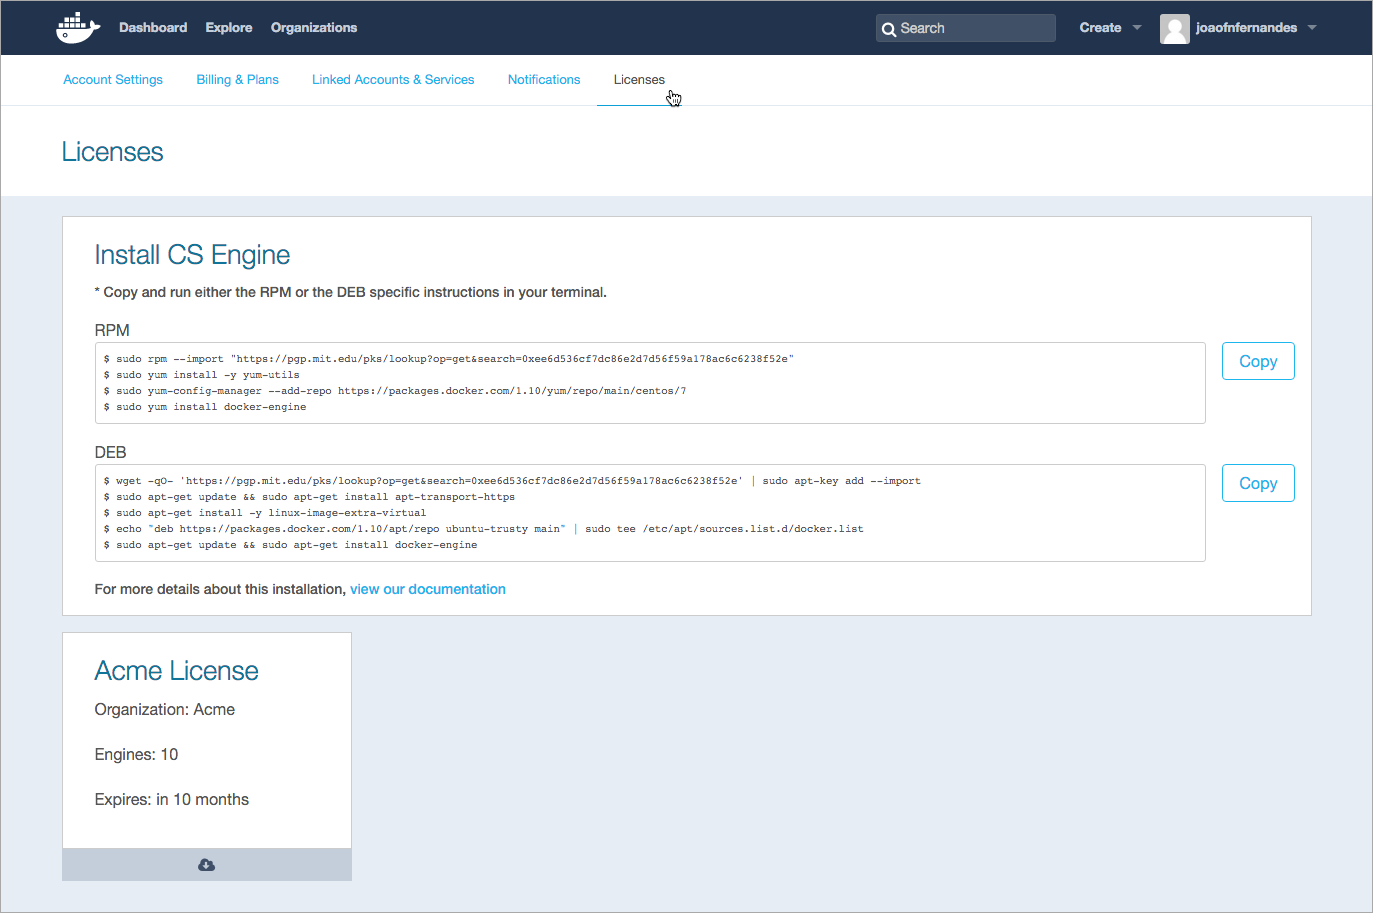
Download the license by clicking on it.
-
Navigate to UCP to apply the license.
In your browser, navigate to the IP of the node where you installed the UCP controller. In this example, it's
https://52.70.188.239.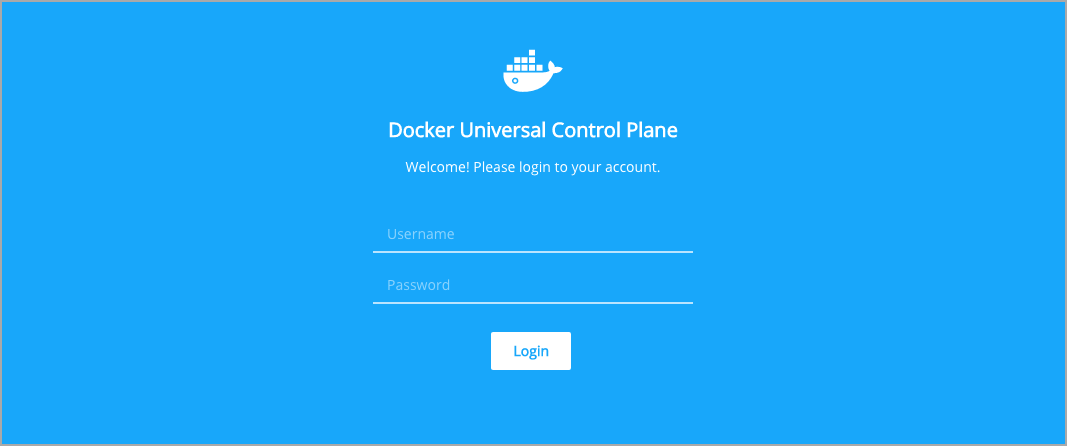
Your browser may warn that the connection to UCP is not secure. The warning appears because you are accessing UCP with HTTPS, but the certificates used by UCP were issued during the installation by a built-in certificate authority.
If you're concerned about security, check the installation messages. You can use the server fingerprint displayed during the installation, and compare it with the certificate displayed on your browser.
-
Login with the admin username and the password you chose during the installation.
If you installed non-interactively, the default administrator credentials are admin/orca.
-
Apply your license file.
After logging in, you're redirected to the licensing page. Click the Upload License button, and choose your license file.

-
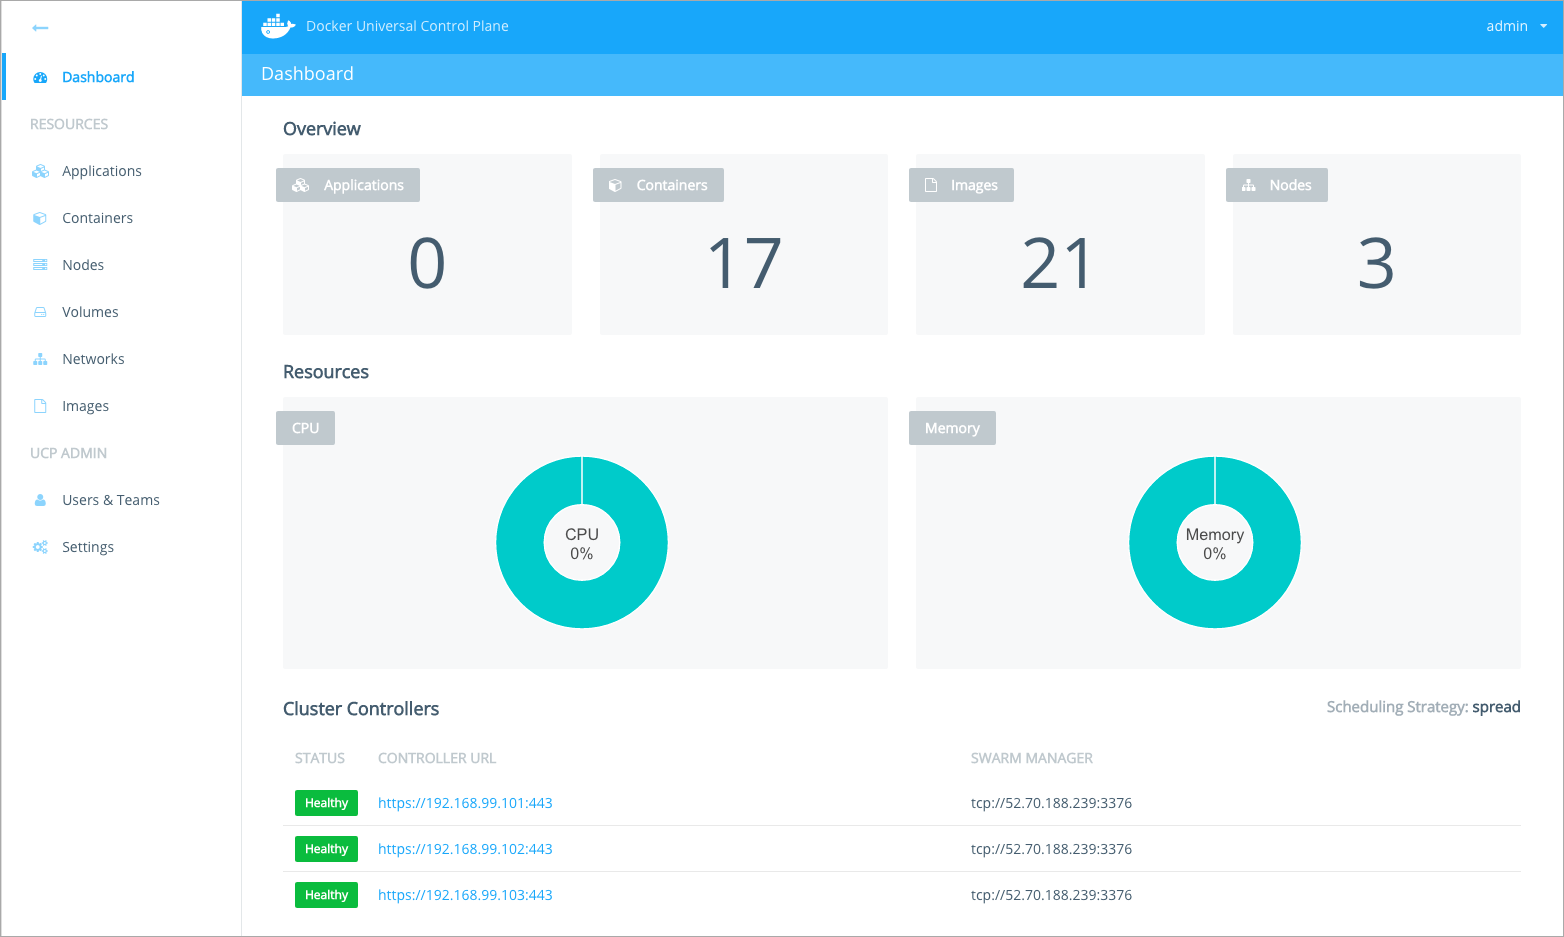
Check the Dashboard page.
After applying the license, you're redirected to the UCP dashboard. It should show that there's only a single node in your cluster: the controller node.

Step 8: Add controller replicas to the UCP cluster
Docker UCP has support for high-availability. You set other nodes to be replicas of the UCP controller, that way you can load-balance user requests across the controller and replica nodes.
For High Availability (HA) installations:
-
Configure the controller and replicas before adding additional nodes to the cluster.
-
Configure at least two replicas in addition to the controller.
Keep in mind that with N controller and replicas, a cluster can only tolerate up to (N-1)/2 node failures.
Also, in UCP v1.0 the controller serves as root CA. During a controller failure, it might not be possible to add more nodes to the cluster. Learn more about high availability.
When adding replica nodes to your installation, you will be prompted for the following information:
- The URL of the UCP controller node, for example
https://52.70.188.239. - The username/password of an UCP administrator account.
- At least one SAN value which is an accessible IP address or fully-qualified domain name for the node.
Be sure to have this information at hand before using the ucp join
command to join the replica nodes to the cluster.
Review the options available on the ucp join command.
$ docker run --rm -it docker/ucp join --help
You can also find the documentation for the ucp join command at
the UCP join command reference page.
For each node that you want to turn into a controller replica:
-
Log into that node.
-
Run the
ucp joincommand:$ docker run --rm -it --name ucp -v /var/run/docker.sock:/var/run/docker.sock docker/ucp join --replica -iThe
joincommand pulls several images and prompts you for the installation values it needs. When it completes, the command notifies you that it is starting Docker Swarm.INFO[0005] Verifying your system is compatible with UCP INFO[0011] Sending add host request to UCP server INFO[0011] Starting local swarm containers -
Repeat steps 1 through 3 on the other nodes you want to set up as replicas.
For high availability, make sure to configure a minimum of 3 controllers: a primary controller and two replicas. Never run a cluster with only the primary controller and a single replica.
-
Log into UCP.
The Dashboard page should now display your new replica nodes. In the bottom of the screen, you can see the health of the controller and replicas.
Step 9: Add more nodes to the UCP cluster
Now you can add additional nodes to your UCP cluster. These are the nodes that will be running your containers.
When adding nodes to your cluster, you will be prompted for the following information:
- The URL of the UCP controller, for example
https://52.70.188.239. - The username/password of an UCP administrator account.
- At least one SAN value which is the actual external, publicly-accessible IP address or fully-qualified domain name for node.
So be sure to have this information at hand. If you're installing UCP on a cloud provider such as AWS, make sure your instance has a public IP or hostname.
Review the options available on the ucp join command:
$ docker run --rm -it docker/ucp join --help
You can also find the documentation for the ucp join command on
the UCP join command reference page.
For each node that you want to add to your UCP cluster:
-
Log into that node.
-
Run the
ucp joincommand.$ docker run --rm -it --name ucp -v /var/run/docker.sock:/var/run/docker.sock docker/ucp join -iThe
joincommand pulls several images and prompts you for the installation values it needs. When it completes, the command notifies you that it is starting Docker Swarm.INFO[0005] Verifying your system is compatible with UCP INFO[0011] Sending add host request to UCP server INFO[0011] Starting local swarm containers -
Repeat steps 1 and 2 on the other nodes you want to add to your UCP cluster.
-
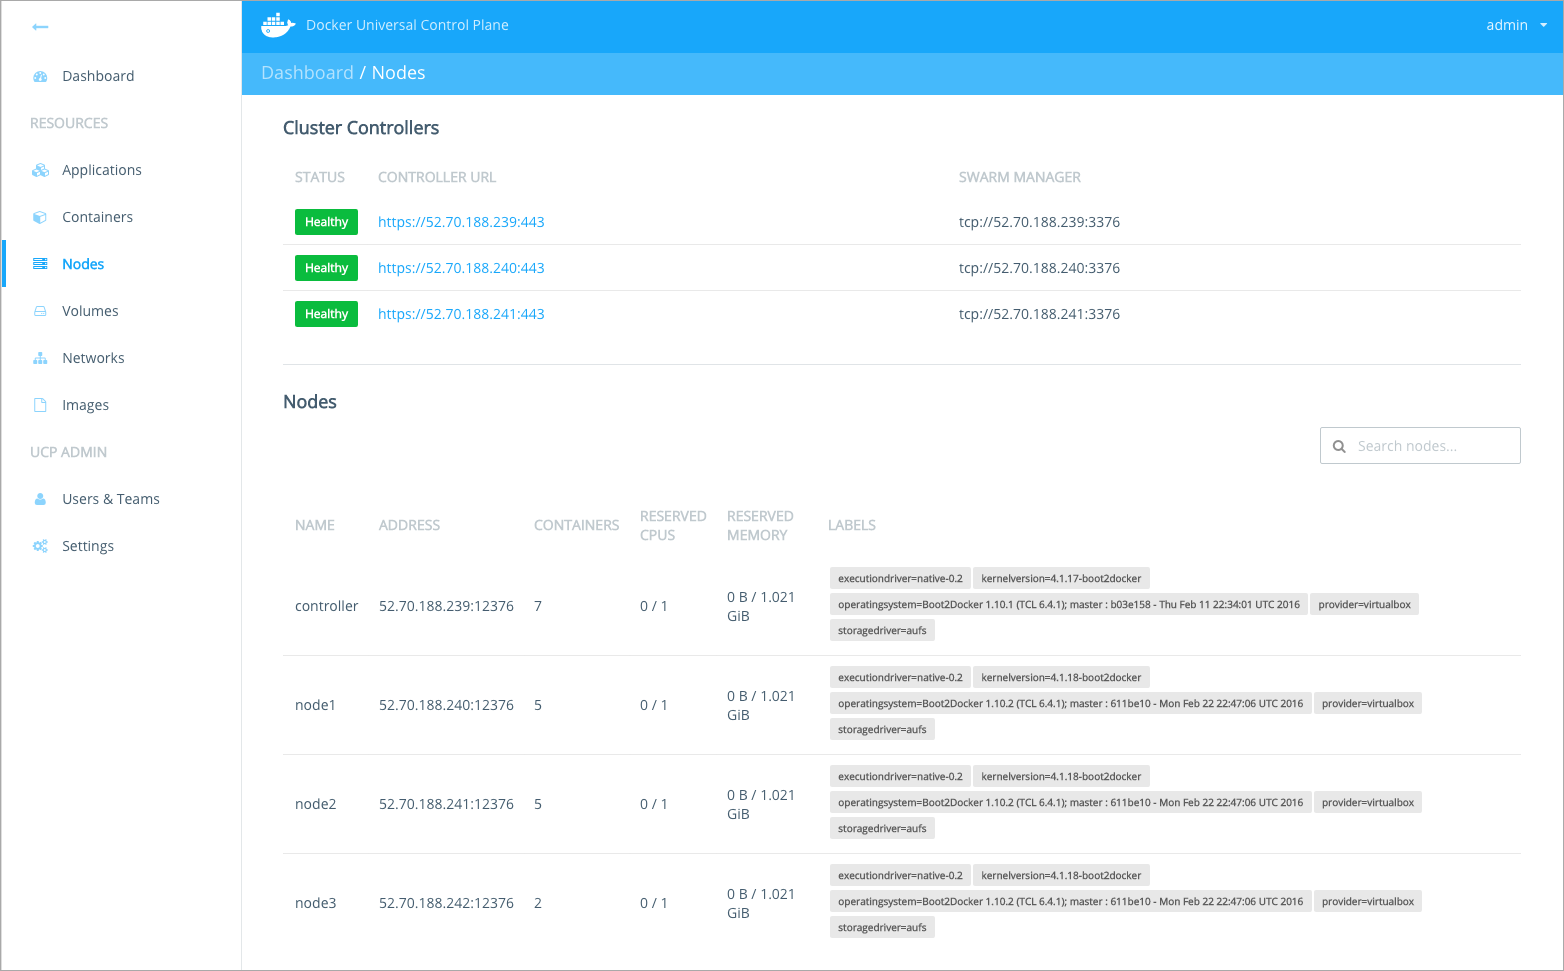
Log into UCP with your browser and navigate to the Nodes page.
The nodes page should now display all the nodes of your cluster.
Step 10: Set up certificates for the Docker CLI
After installing UCP, you can run the docker command, against UCP
cluster nodes.
Since all traffic between users and UCP nodes is secure and authenticated,
when using the Docker CLI client, you'll need to provide client certificates.
You have two ways of downloading a bundle that contains the client certificates for a user:
- Download them from the UCP web app, or
- Download them from the REST API, using the
curlcommand.
Download the client bundle from the UCP web app
-
If you haven't already done so, log into UCP.
-
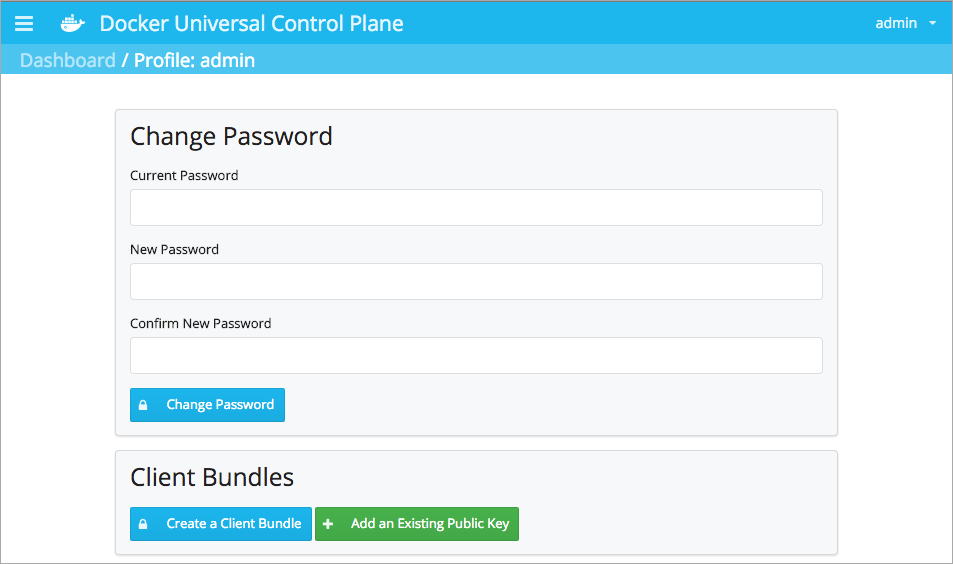
Navigate to your profile.
As an example, if you're logged in as the
Adminuser, on the right-hand menu, navigate to Admin > Profile. -
Click the Create Client Bundle button.
The browser downloads the
ucp-bundle-admin.zipfile.
Download the client bundle using the REST API
You can download the client certificate bundle, using the UCP REST API. In
this example we'll be using curl for making the web requests to the API, and
jq to parse the responses from the API.
-
In the command line, log into a machine with network access to the UCP controller.
You might log into the controller node itself, or any machine that can
pingit. -
Install the
curl,zip,jqpackages if you don't have them.On Ubuntu, the installation looks like this:
$ sudo apt-get install zip curl jq Reading package lists... Done Building dependency tree Reading state information... Done The following extra packages will be installed: libcurl3 The following NEW packages will be installed: jq zip The following packages will be upgraded: curl libcurl3 ----output snipped---- -
Create an environment variable to hold your user security token.
To connect to the UCP controller with
curl, you must export your user security token from the UCP controller.$ AUTHTOKEN=$(curl -sk -d '{"username":"admin","password":"<password>"}' https://<ducp-0 IP>/auth/login | jq -r .auth_token) -
Curl the client bundle down to your node.
$ curl -k -H "Authorization: Bearer $AUTHTOKEN" https://<ducp-0 IP>/api/clientbundle -o bundle.zipCurl downloads a
bundle.zipfile to your working directory.
Install the certificate bundle
Once you download the bundle, you can unzip and use it.
-
Make sure you have
zipinstalled.$ which unzip /usr/bin/unzipIf you don't, install it before continuing.
-
Open the folder containing the bundle file.
-
Unzip the file to reveal its contents.
ucp-bundle ├── ca.pem ├── cert.pem ├── cert.pub ├── env.sh └── key.pem -
Set up your environment by running the
env.shfile.$ source env.sh -
Use the
docker infocommand to get the location of the Swarm managers and engines.$ docker info Containers: 9 Images: 9 Role: primary Strategy: spread Filters: health, port, dependency, affinity, constraint Nodes: 1 node1: 192.168.122.7:12376 └ Containers: 9 └ Reserved CPUs: 0 / 1 └ Reserved Memory: 0 B / 2.054 GiB └ Labels: executiondriver=native-0.2, kernelversion=4.0.9-boot2docker, operatingsystem=Boot2Docker 1.8.1 (TCL 6.3); master : eb5571f - Thu Sep 3 22:18:54 UTC 2015, provider=kvm, storagedriver=aufs Cluster Managers: 1 192.168.122.7: Healthy └ Orca Controller: https://192.168.122.7 └ Swarm Manager: tcp://192.168.122.7:3376 └ KV: etcd://192.168.122.7:12379 CPUs: 1 Total Memory: 2.054 GiB Name: node1 ID: PNLT:MFCO:DDWL:MSLF:YVHU:35Z3:66KM:DFZM:OPBK:D4BQ:EKNT:6DXA Labels: com.docker.ucp.license_key=unlicensed com.docker.ucp.license_max_engines=0 com.docker.ucp.license_expires=EXPIRED
Client bundles with an externally managed CA
When using UCP with an external Certificate Authority, client bundles for non-admin users won't be signed automatically. It is still possible to manually issue certificates signed by the Certificate Authority, that UCP users can use to interact with UCP with the CLI client.
-
Generate a 2048-bit RSA private key.
$ openssl genrsa -out key.pem 2048 -
Generate a Certificate Signing Request (CSR).
The output
cert.csrshould be provided to your organization's CA owner to be signed, with a minimum of client authentication usage.$ openssl req -new -sha256 -key key.pem -out cert.csr -
Your CA owner signs the CSR, and provides the
cert.pemandca.pemfiles. -
Extract the public key from the signed certificate:
$ openssl x509 -pubkey -noout -in cert.pem > cert.pub -
Add the content of the
cert.pubto your UCP profile.In the UCP web app, navigate to your profile, and click the Add an Existing Public Key button.
Set a name, and the contents of the
cert.pubfile. -
Set the necessary environment variables.
Now that you have linked the public key to you account, you need to configure your CLI client. Set the following environment variables:
export DOCKER_TLS_VERIFY=1
export DOCKER_CERT_PATH=$(pwd)
export DOCKER_HOST=tcp://<ucp-hostname>:443
Disable collection of usage metrics
UCP collects anonymous usage metrics, to help us improve it. These metrics are entirely anonymous, don't identify your company, users, applications, or any other sensitive information.
To disable usage reporting:
-
Log into Docker UCP
-
Navigate to the Settings screen
-
In the Anonymous Usage Reporting section, toggle:
- Enable hourly usage reporting, to send sending usage reports.
- Enable API tracking, to send sending metrics on each API call.
-
Click the Update Usage Reporting button, to save your changes.