20 KiB
| title | description | keywords | toc_max |
|---|---|---|---|
| Get started | Getting started with Atomist | atomist, software supply chain, vulnerability scanning, tutorial | 2 |
{% include atomist/disclaimer.md %}
To get started with Atomist, you'll need to:
- Connect Atomist with your container registry
- Link your container images with their Git source
Before you can begin the setup, you need a Docker ID. If you don't already have one, you can register here{: target="blank" rel="noopener" class=""}.
Connect container registry
This section describes how to integrate Atomist with your container registry. Follow the applicable instructions depending on the type of container registry you use. After completing this setup, Atomist will have read-only access to your registry, and gets notified about pushed or deleted images.
Using Docker Hub? 🐳
If you are using Docker Hub as your container registry, you can skip this step and go straight to linking images to Git source. Atomist integrates seamlessly with your Docker Hub organizations.
- Amazon
- GitHub
- JFrog
When setting up an Amazon Elastic Container Registry (ECR) integration with Atomist, the following AWS resources are required:
- Read-only Identity Access Management (IAM) role, for Atomist to be able to access the container registry
- Amazon EventBridge, to notify Atomist of pushed and deleted images
This procedure uses pre-defined CloudFormation templates to create the necessary
IAM role and Amazon EventBridge. This template protects you from
confused deputy attacks{:
target="blank" rel="noopener" class=""} by ensuring a unique ExternalId, along
with the appropriate condition on the IAM role statement.
-
Go to https://dso.docker.com and sign in using your Docker ID credentials.
-
Navigate to the Integrations tab and select Configure next to the Elastic Container Registry integration.
-
Fill out all the fields, except Trusted Role ARN. The trusted role identity is known only after applying the CloudFormation template.
Choose basic auth credentials to protect the endpoint that AWS uses to notify Atomist. The URL and the basic auth credentials are parameters to the CloudFormation template.
-
Now create the CloudFormation stack. Before creating the stack, AWS asks you to enter three parameters.
Url: the API endpoint copied from AtomistUsername,Password: basic authentication credentials for the endpoint. Must match what you entered in the Atomist workspace.
Use the following Launch Stack buttons to start reviewing the details in your AWS account.
Note
Before creating the stack, AWS will ask for acknowledgement that creating this stack requires a capability. This stack creates a role that will grant Atomist read-only access to ECR resources.

Region ecr-integration.template us-east-1 
us-east-2
us-west-1
us-west-2
eu-west-1
eu-west-2
eu-west-3
eu-central-1
ca-central-1
ap-southeast-2
-
After creating the stack, copy the Value for the AssumeRoleArn key from the Outputs tab in AWS.
 {: width="700px"}
 -
Paste the copied AssumeRoleArn value into the Trusted Role ARN field on the Atomist configuration page.
-
Select Save Configuration.
Atomist tests the connection with your ECR registry. A green check mark displays beside the integration if a successful connection is made.
 {:
width="700px"}
{:
width="700px"}
To integrate Atomist with GitHub Container Registry, connect your GitHub account, and enter a personal access token for Atomist to use when pulling container images.
-
Go to https://dso.docker.com and sign in using your Docker ID credentials.
-
Connect your GitHub account as instructed in the GitHub app page.
-
Open the Integrations tab, and select Configure next to the GitHub Container Registry in the list.
-
Fill out the fields and select Save Configuration.
Atomist requires the Personal access token for connecting images to private repositories. The token must have the
read:packagesscope{: target="blank" rel="noopener" class=""}.Leave the Personal access token field blank if you only want to index images in public repositories.
Setting up an Atomist integration with Google Container Registry and Google Artifact Registry involves:
- Creating a service account and grant it a read-only access role.
- Creating a PubSub subscription on the
gcrtopic to watch for activity in the registry.
To complete the following procedure requires administrator's permissions in the project.
-
Set the following environment variables. You will use them in the next steps when configuring the Google Cloud resources, using the
gcloudCLI.export SERVICE_ACCOUNT_ID="atomist-integration" # can be anything you like export PROJECT_ID="YOUR_GCP_PROJECT_ID" -
Create the service account.
gcloud iam service-accounts create ${SERVICE_ACCOUNT_ID} \ --project ${PROJECT_ID} \ --description="Atomist Integration Service Account" \ --display-name="Atomist Integration" -
Grant the service account read-only access to the artifact registry.
The role name differs depending on whether you use Artifact Registry or Container Registry:
roles/artifactregistry.readerfor Google Artifact Registryroles/object.storageViewerfor Google Container Registry
gcloud projects add-iam-policy-binding ${PROJECT_ID} \ --project ${PROJECT_ID} \ --member="serviceAccount:${SERVICE_ACCOUNT_ID}@${PROJECT_ID}.iam.gserviceaccount.com" \ --role="roles/artifactregistry.reader" # change this if you use GCR -
Grant service account access to Atomist.
gcloud iam service-accounts add-iam-policy-binding "${SERVICE_ACCOUNT_ID}@${PROJECT_ID}.iam.gserviceaccount.com" \ --project ${PROJECT_ID} \ --member="serviceAccount:atomist-bot@atomist.iam.gserviceaccount.com" \ --role="roles/iam.serviceAccountTokenCreator" -
Go to dso.docker.com{: target="blank" rel="noopener" class=""} and sign in with your Docker ID credentials.
-
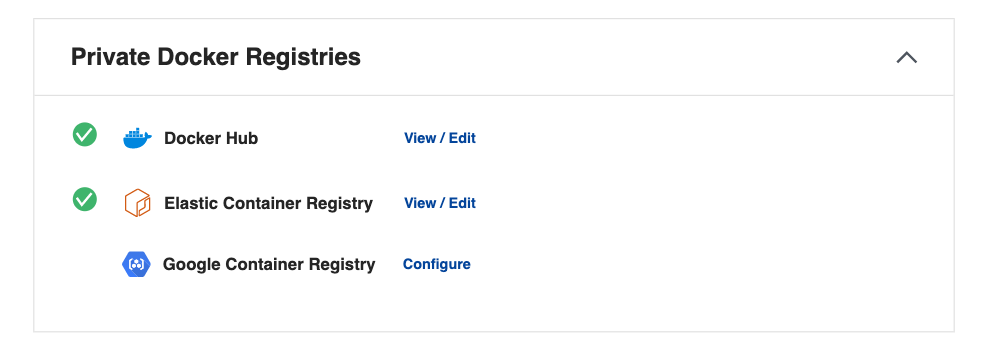
Navigate to the Integrations tab and select Configure next to the Google Artifact Registry integration.
-
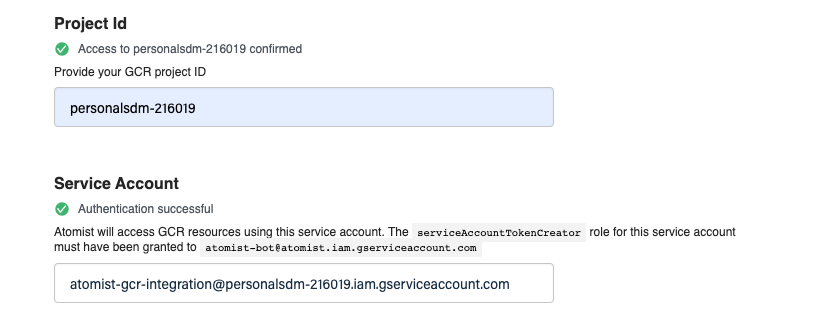
Fill out the following fields:
- Project ID is the
PROJECT_IDused in earlier steps. - Service Account: The email address of the service account created step 2.
- Project ID is the
-
Select Save Configuration. Atomist will test the connection. Green check marks indicate a successful connection.
 {:
width="700px"}
{:
width="700px"}Next, create a new PubSub subscription on the
gcrtopic in registry. This subscription notifies Atomist about new or deleted images in the registry. -
Copy the URL in the Events Webhook field to your clipboard. This will be the
PUSH_ENDPOINT_URIfor the PubSub subscription. -
Define the following three variable values, in addition to the
PROJECT_IDandSERVICE_ACCOUNT_IDfrom earlier:PUSH_ENDPOINT_URL: the webhook URL copied from the Atomist workspace.SERVICE_ACCOUNT_EMAIL: the service account address; a combination of the service account ID and project ID.SUBSCRIPTION: the name of the PubSub (can be anything).
PUSH_ENDPOINT_URI={COPY_THIS_FROM_ATOMIST} SERVICE_ACCOUNT_EMAIL="${SERVICE_ACCOUNT_ID}@${PROJECT_ID}.iam.gserviceaccount.com" SUBSCRIPTION="atomist-integration-subscription" -
Create the PubSub for the
gcrtopic.gcloud pubsub subscriptions create ${SUBSCRIPTION} \ --topic='gcr' \ --push-auth-token-audience='atomist' \ --push-auth-service-account="${SERVICE_ACCOUNT_EMAIL}" \ --push-endpoint="${PUSH_ENDPOINT_URI}"
When the first image push is successfully detected, a green check mark on the integration page will indicate that the integration works.
Atomist can index images in a JFrog Artifactory repository by means of a monitoring agent.
The agent scans configured repositories at regular intervals, and send newly discovered images' metadata to the Atomist data plane.
In the following example, https://hal9000.atomist.com is a private registry
only visible on an internal network.
docker run -ti atomist/docker-registry-broker:latest\
  index-image remote \
  --workspace AQ1K5FIKA \
  --api-key team::6016307E4DF885EAE0579AACC71D3507BB38E1855903850CF5D0D91C5C8C6DC0 \
  --artifactory-url https://hal9000.docker.com \
  --artifactory-repository atomist-docker-local \
  --container-registry-host atomist-docker-local.hal9000.docker.com
  --username admin \
  --password password
| Parameter | Description |
|---|---|
workspace |
ID of your Atomist workspace. |
api-key |
Atomist API key. |
artifactory-url |
Base URL of the Artifactory instance. Must not contain trailing slashes. |
artifactory-repository |
The name of the container registry to watch. |
container-registry-host |
The hostname associated with the Artifactory repository containing images, if different from artifactory-url. |
username |
Username for HTTP basic authentication with Artifactory. |
password |
Password for HTTP basic authentication with Artifactory. |
Link images to Git repository
Knowing the source repository of an image is a prerequisite for Atomist to interact with the Git repository. For Atomist to be able to link scanned images back to a Git repository repository, you must annotate the image at build time.
The image labels that Atomist requires are:
| Label | Value |
|---|---|
org.opencontainers.image.revision |
The commit revision that the image is built for. |
com.docker.image.source.entrypoint |
Path to the Dockerfile, relative to project root. |
For more information about pre-defined OCI annotations, see the specification document on GitHub{: target="blank" rel="noopener" class=""}.
You can add these labels to images using the built-in Git provenance feature of
Buildx, or set using the --label CLI argument.
Add labels using Docker Buildx
Beta
Git provenance labels in Buildx is a Beta feature.
To add the image labels using Docker Buildx, set the environment variable
BUILDX_GIT_LABELS=1. The Buildx will create the labels automatically when
building the image.
export BUILDX_GIT_LABELS=1
docker buildx build . -f docker/Dockerfile
Add labels using the label CLI argument
Assign image labels using the --label argument for docker build.
docker build . -f docker/Dockerfile -t $IMAGE_NAME \
    --label "org.opencontainers.image.revision=10ac8f8bdaa343677f2f394f9615e521188d736a" \
    --label "com.docker.image.source.entrypoint=docker/Dockerfile"
Images built in a CI/CD environment can leverage the built-in environment variables when setting the Git revision label:
| Build tool | Environment variable |
|---|---|
| GitHub Actions | {% raw %}${{ github.sha }}{% endraw %} |
| GitHub Actions, pull requests | {% raw %}${{ github.event.pull_request.head.sha }}{% endraw %} |
| GitLab CI/CD | $CI_COMMIT_SHA |
| Docker Hub automated builds | $SOURCE_COMMIT |
| Google Cloud Build | $COMMIT_SHA |
| AWS CodeBuild | $CODEBUILD_RESOLVED_SOURCE_VERSION |
| Manually | $(git rev-parse HEAD) |
Consult the documentation for your CI/CD platform to learn which variables to use.
Where to go next
Atomist is now tracking bill of materials, packages, and vulnerabilities for your images! You can view your image scan results on the images overview page{: target="blank" rel="noopener" class=""}.
Teams use Atomist to protect downstream workloads from new vulnerabilities. It's also used to help teams track and remediate new vulnerabilities that impact existing workloads. The following sections describe integrate and configure Atomist further. For example, to gain visibility into container workload systems like Kubernetes.
- Connect Atomist with your GitHub repositories by installing the Atomist app for your GitHub organization.
- Manage which Atomist features you use in settings.
- Learn about deployment tracking and how Atomist can help watch your deployed containers.
- Atomist watches for new advisories from public sources, but you can also add your own internal advisories for more information.