7.2 KiB
| title | description | keywords |
|---|---|---|
| Minimal docker CLI extension tutorial | Minimal docker CLI extension tutorial | Docker, extensions, sdk, tutorial |
Learn how to create a simple Docker extension that invokes Docker CLI commands.
Prerequisites
Extension folder structure
A Docker extension is made of several files which range from the extension's source code to the required extension-specific files.
In the minimal-docker-cli sample folder, you can find a ready-to-go example that represents a UI Extension invoking Docker commands. We will go through this code example in this tutorial.
Although you can start from an empty directory, it is highly recommended that you start from the template below and change it accordingly to suit your needs.
.
├── Dockerfile # (1)
├── metadata.json # (2)
└── client # (3)
│   └── src
│       ├── App.tsx
│       └── ... React aplication
- Contains everything required to build the extension and run it in Docker Desktop.
- A file that provides information about the extension such as the name, description, and version.
- The source folder that contains all your HTML, CSS and JS files. In this example we use a React frontend, the main part of th extension is an App.tsx.
Invoke docker CLI in your javascript code
Let's reuse the React extension from the React extension tutorial, and see how we can invoke docker commands from the App.tsx file.
Use the Docker Desktop Client object to discover extension APIs about docker. The application uses @docker/extension-api-client in order to obtain a Docker Desktop Client object. Because we have set @docker/extension-api-client-types as a dev dependency, we also have auto-completion in our IDE:

We can invoke a Docker command with ddClient.docker.cli.exec().
For example, to run docker info and obtain json formatted results:
{% raw %}ddClient.docker.cli.exec("info", ["--format", '"{{ json . }}"']){% endraw %}.
We can use result.parseJsonObject() to read results as a json object and use it in our application.
const ddClient = createDockerDesktopClient();
const [dockerInfo, setDockerInfo] = useState<any>(null);

async function runDockerInfo() {
  const result = await ddClient.docker.cli.exec("info", [
    "--format",
    {% raw %}'"{{json .}}"',{% endraw %}
  ]);
  setDockerInfo(result.parseJsonObject());
}
We can then use our dockerInfo object in the display part of the application.
Create a Dockerfile
An extension requires a Dockerfile to build, publish, and run in Docker Desktop.
At minimum, your Dockerfile needs:
- Labels which provide extra information about the extension.
- The source code which in this case is an
index.htmlthat sits within theuifolder.index.htmlrefers to javascript code inscript.js. - The
metadata.jsonfile.
FROM node:17.7-alpine3.14 AS client-builder
# ... build React application

FROM scratch

LABEL org.opencontainers.image.title="MyExtension" \
    org.opencontainers.image.description="A sample extension to show how easy it's to get started with Desktop Extensions." \
    org.opencontainers.image.vendor="Docker Inc." \
    com.docker.desktop.extension.api.version="1.0.0-beta.1" \
    com.docker.desktop.extension.icon="https://www.docker.com/wp-content/uploads/2022/03/Moby-logo.png"

COPY ui ./ui
COPY metadata.json .
Configure the metadata file
A metadata.json file is required at the root of the image filesystem.
{
  "ui": {
    "dashboard-tab": {
      "title": "Docker VM info",
      "root": "/ui",
      "src": "index.html"
    }
  }
}
Build the extension
To build the extension, run:
docker build -t desktop-docker-cli-minimal-extension:0.0.1 .
Build the extension for multiple platforms
To build the extension for multiple platforms, run:
docker buildx build --platform=linux/amd64,linux/arm64 -t desktop-docker-cli-minimal-extension:0.0.1 .
Validate the extension
Verify the extension image is compliant.
The validation checks if the extension's Dockerfile specifies all the required labels and if the metadata file is valid against the JSON schema file.
docker extension validate desktop-docker-cli-minimal-extension:0.0.1
If your extension is valid, the message below displays:
The extension image "desktop-docker-cli-minimal-extension:0.0.1" is valid.
Install the extension
To install the extension in Docker Desktop, run:
docker extension install desktop-docker-cli-minimal-extension:0.0.1
If the installation is successful, the output below displays:
Installing new extension "MyExtension" with desktop-docker-cli-minimal-extension:0.0.1 ...
Installing Desktop extension UI for tab "My Extension"...
Extension UI tab "Docker VM info" added.
Extension "MyExtension" installed successfully
Preview the extension
You can also enter the command below to verify the extension installed successfully:
docker extension ls
It outputs all the extensions installed:
PLUGIN              PROVIDER            IMAGE                                       UI                  VM  HOST
MyExtension         Docker Inc.         desktop-docker-cli-minimal-extension:0.0.1  1 tab(My Extension) -   -
To preview the extension in Docker Desktop, close and open the Docker Desktop dashboard once the installation is complete.
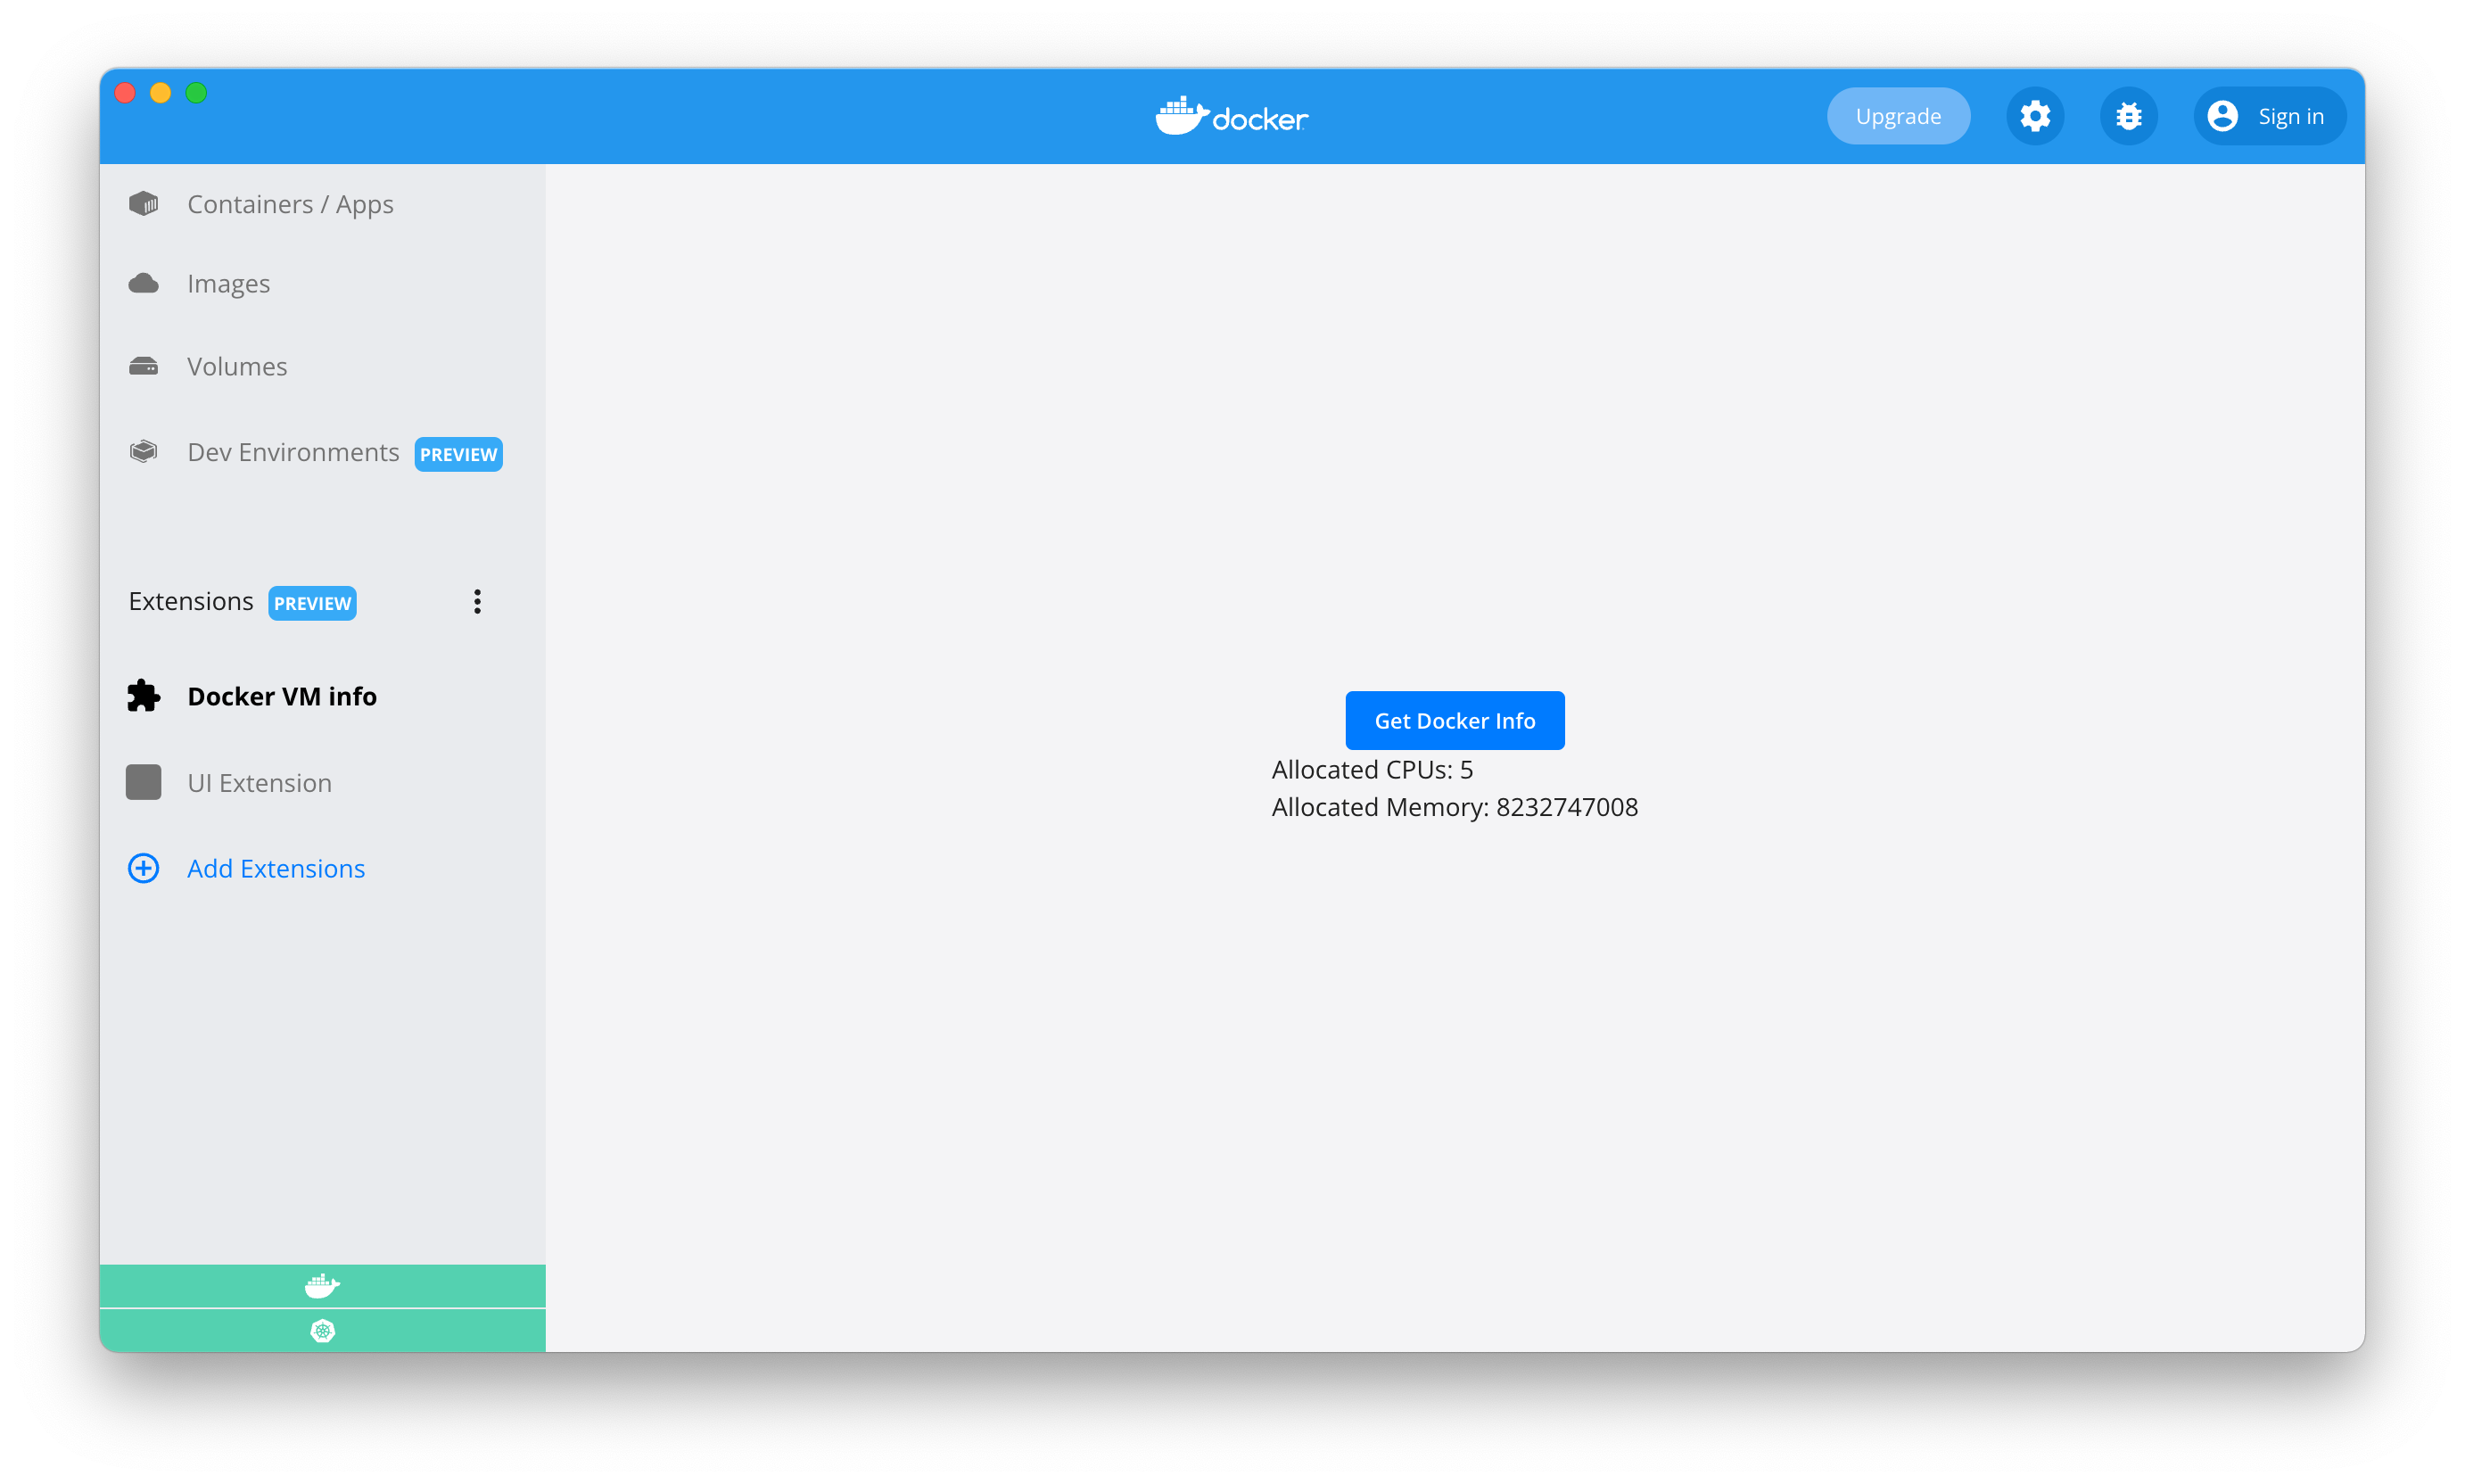
The left-hand menu displays a new tab with name Docker VM info. When you select the new tab, the result below is rendered.
Publish the extension
To publish the extension, upload the Docker image to DockerHub.
Tag the previous image to prepend the account owner at the beginning of the image name:
docker tag desktop-docker-cli-minimal-extension:0.0.1 owner/desktop-docker-cli-minimal-extension:0.0.1
Push the image to DockerHub:
docker push owner/desktop-docker-cli-minimal-extension:0.0.1
Publishing extensions in the marketplace
For Docker Extensions images to be listed in Docker Desktop, they must be approved by Docker and be tagged following semantic versioning, e.g:
0.0.1.See distribution and new releases for more information.
See semver.org to learn more about semantic versioning.
Having trouble to push the image?
Ensure you are logged into DockerHub. Otherwise, run
docker loginto authenticate.
Clean up
To remove the extension, run:
docker extension rm desktop-docker-cli-minimal-extension
The following output displays:
Removing extension MyExtension...
Extension UI tab Disk usage removed
Extension "MyExtension" removed
What's next?
Learn how to create a minimal backend extension.