2.2 KiB
| title | keywords | description |
|---|---|---|
| Publish your images | get started, quick start, intro, concepts | Learn how to publish your own images |
Follow this guide to learn how you can share your packaged application in an image using Docker Hub.
Step 1: Get an image
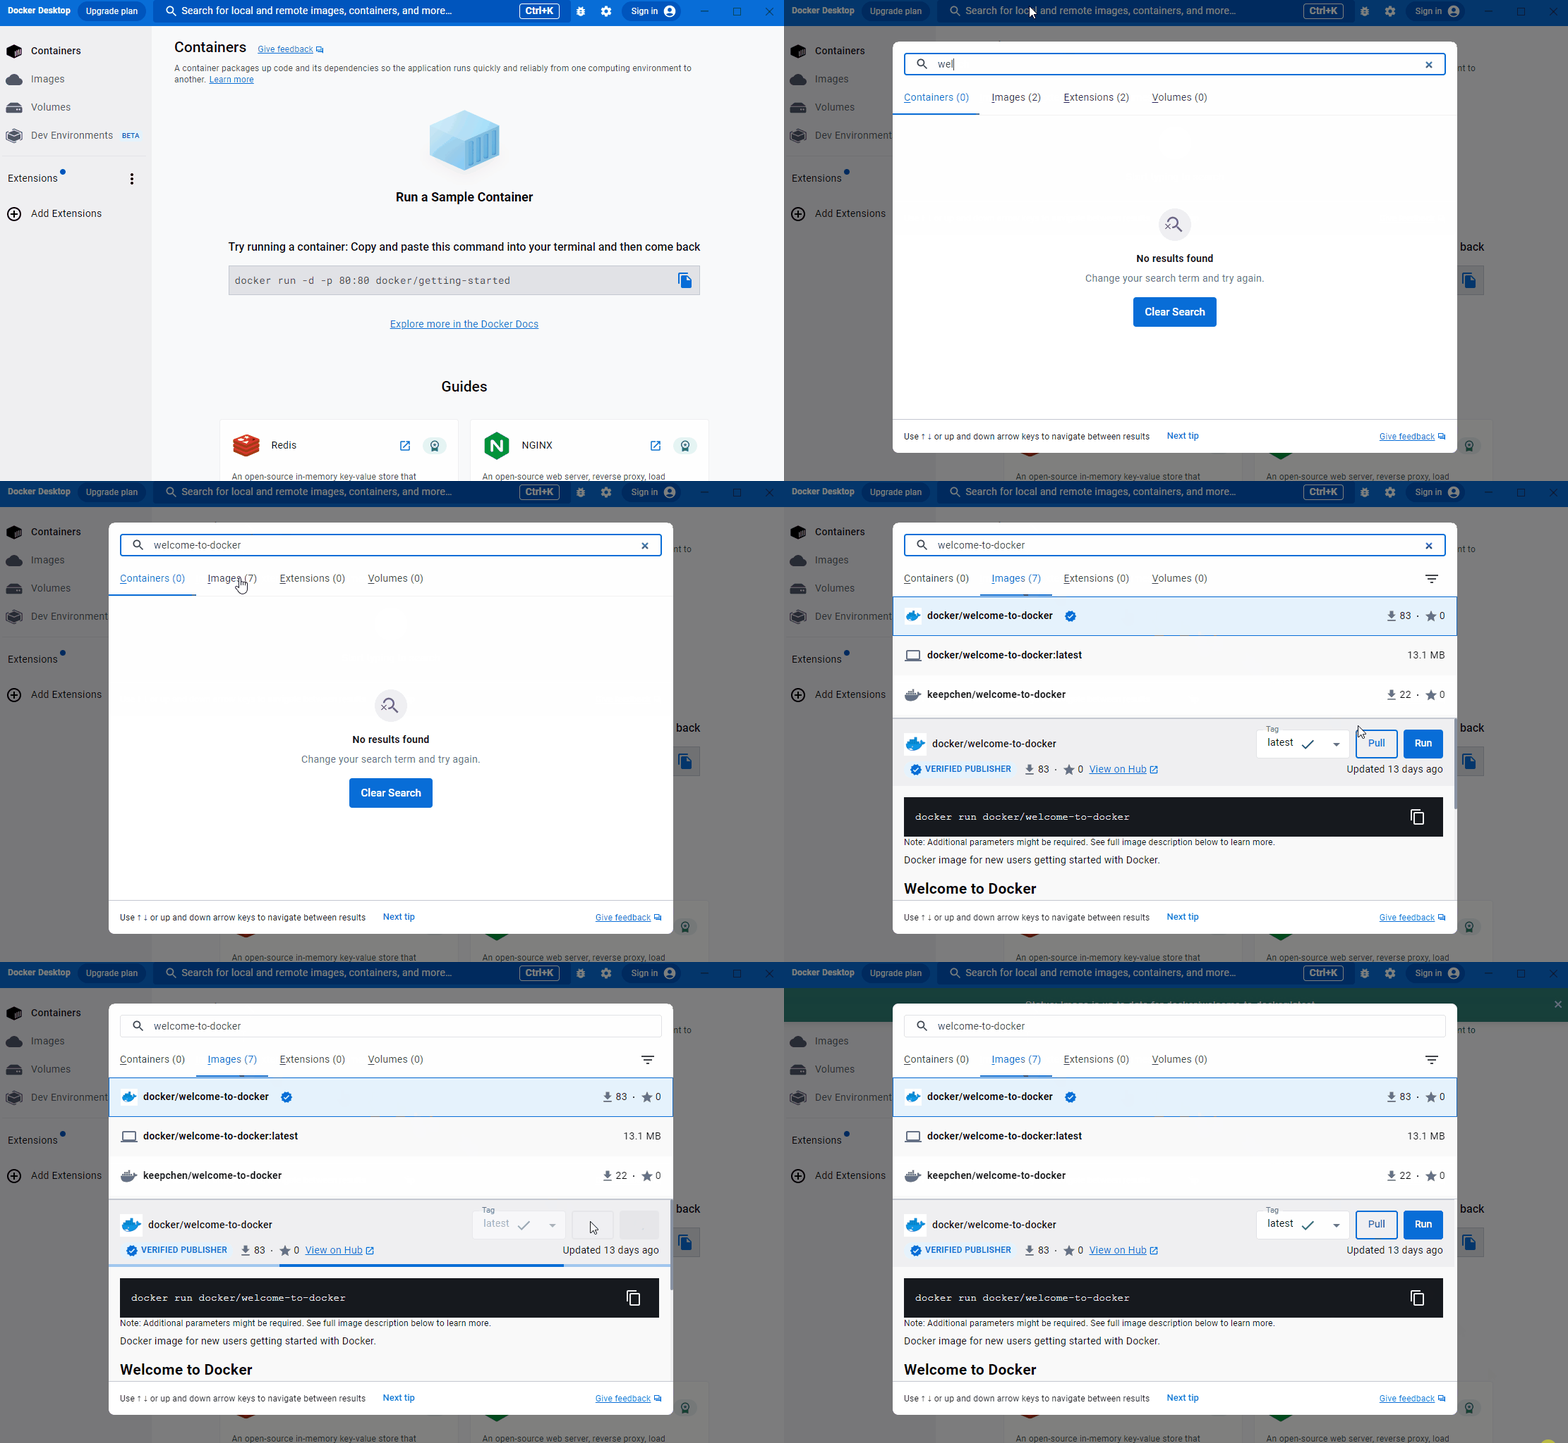
Before you publish your image, you need an image to publish. For this guide, use the welcome-to-docker image.
To get the image, use Docker Desktop to search for the welcome-to-docker image, and then select Pull.
Step 2: Sign in to Docker
To publish images publicly on Docker Hub, you first need an account. Select Sign in on the top-right of Docker Desktop to either sign in or create a new account on Docker Hub.
Step 3: Rename your image
Before you can publish your image to Docker Hub, you need to rename it so that Docker Hub knows that the image is yours. Run the following docker tag command in your terminal to rename your image. Replace YOUR-USERNAME with your Docker ID.
$ docker tag docker/welcome-to-docker YOUR-USERNAME/welcome-to-docker
Step 4: Push your image to Docker Hub
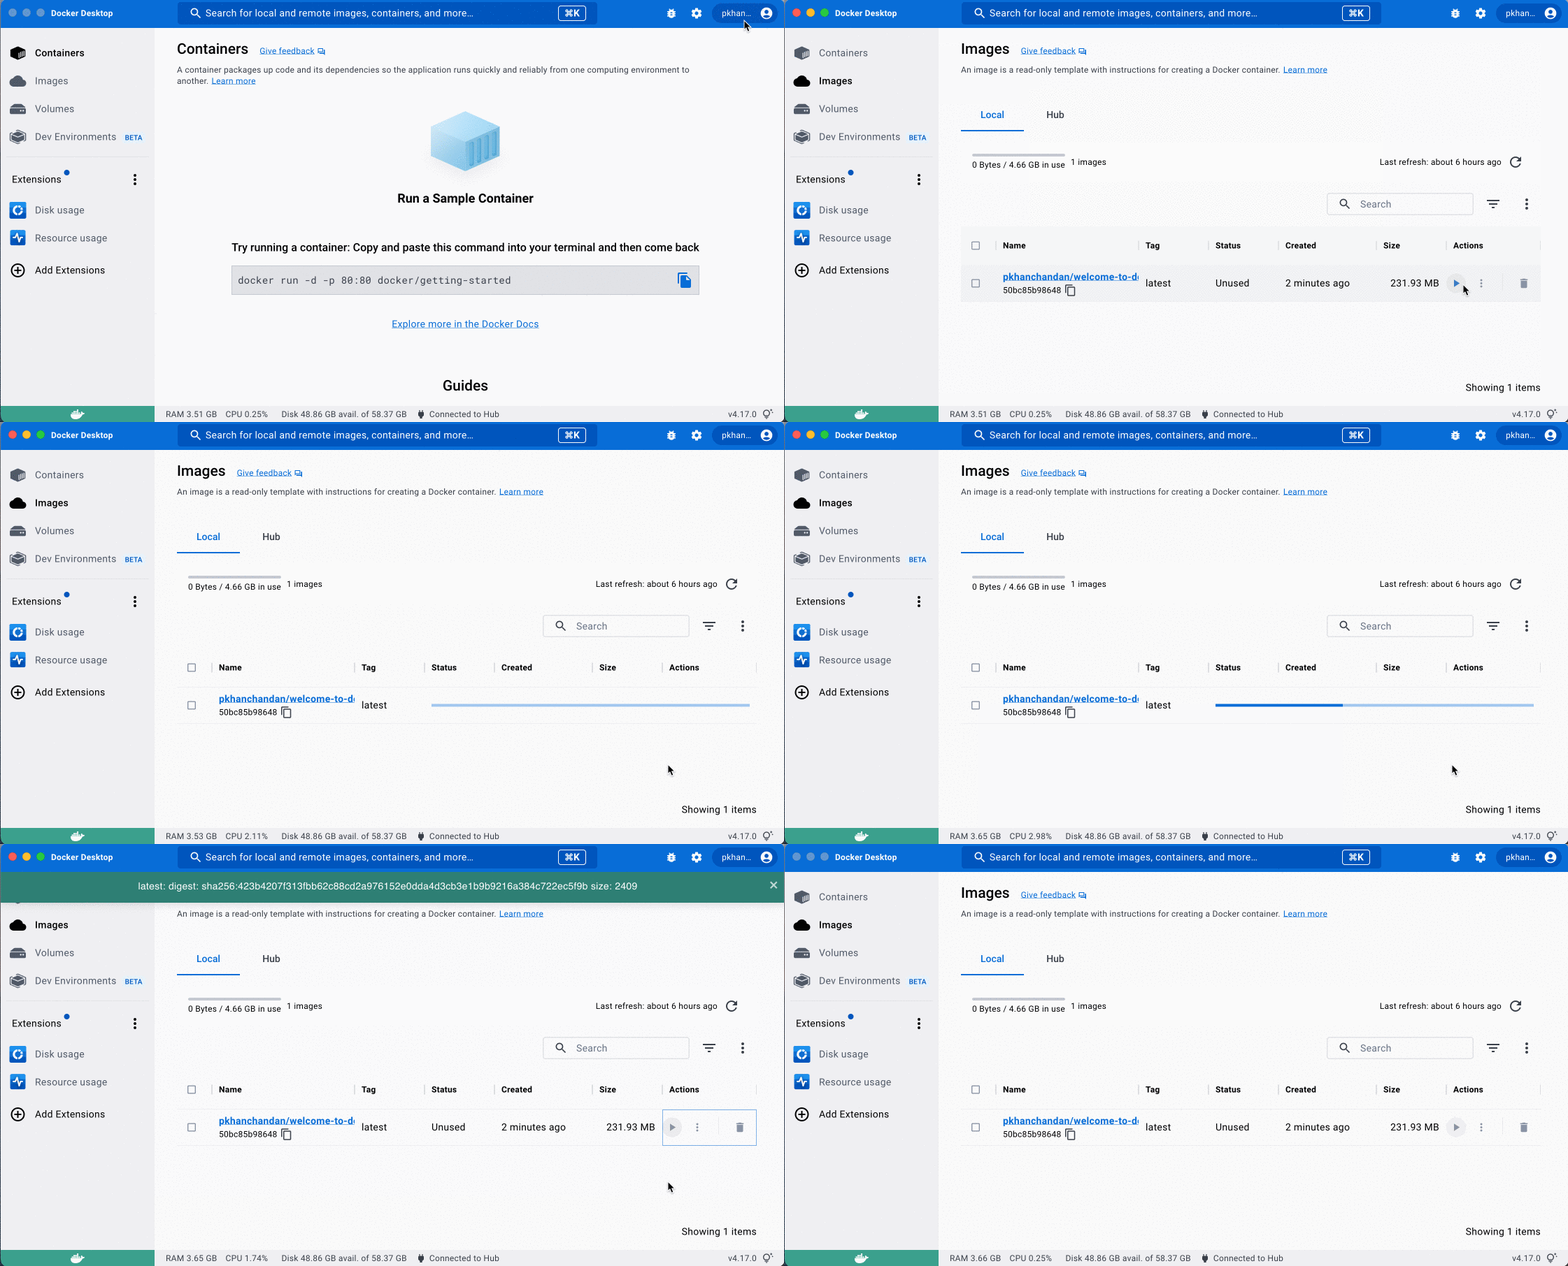
In Docker Desktop, go to the Images tab and find your image. In the Actions column, select the Show image actions icon and then select Push to Hub. Your image uploads to Docker Hub and is publicly available for anyone to use.
Step 5: Verify the image is on Docker Hub
That's it! Your image is now shared on Docker Hub. In your browser, go to Docker Hub{:target="blank" rel="noopener" class=""} and verify that you see the welcome-to-docker repository.
What's next
In this guide you learned how to publish your own image to Docker Hub. Continue to the following language-specific guides to learn more about creating images for applications in other languages:


