16 KiB
| aliases | description | keywords | menu | title | ||||||||||||||
|---|---|---|---|---|---|---|---|---|---|---|---|---|---|---|---|---|---|---|
|
Getting Started |
|
|
Getting Started |
Getting Started with Docker for Mac
Welcome to Docker for Mac!
Please read through these topics on how to get started. To give us feedback on your experience with the app and report bugs or problems, log in to our Docker for Mac forum.
Already have Docker for Mac? If you already have Docker for Mac installed, and are ready to get started, skip over to the Getting Started with Docker tutorial.
Download Docker for Mac
If you have not already done so, please install Docker for Mac. You can download installers from the stable or beta channel.
For more about stable and beta channels, see the FAQs.
| Stable channel | Beta channel |
|---|---|
| This installer is fully baked and tested, and comes with the latest GA version of Docker Engine. This is the best channel to use if you want a reliable platform to work with. These releases follow a version schedule with a longer lead time than the betas, synched with Docker Engine releases and hotfixes. |
This installer offers cutting edge features and comes with the experimental version of Docker Engine, which is described in the Docker Experimental Features README on GitHub. This is the best channel to use if you want to experiment with features we are working on as they become available, and can weather some instability and bugs. This channel is a continuation of the beta program, where you can provide feedback as the apps evolve. Releases are typically more frequent than for stable, often one or more per month. |
|
Get Docker for Mac (stable) Download checksum: Docker.dmg SHA256 |
Get Docker for Mac (beta) Download checksum: Docker.dmg SHA256 |
Important Notes:
Docker for Mac requires OS X 10.10.3 Yosemite or newer running on a 2010 or newer Mac, with Intel's hardware support for MMU virtualization. Please see What to know before you install for a full list of prerequisites.
You can switch between beta and stable versions, but you must have only one app installed at a time. Also, you will need to save images and export containers you want to keep before uninstalling the current version before installing another. For more about this, see the FAQs about beta and stable channels.
What to know before you install
-
README FIRST for Docker Toolbox and Docker Machine users: If you are already running Docker on your machine, first read Docker for Mac vs. Docker Toolbox to understand the impact of this installation on your existing setup, how to set your environment for Docker for Mac, and how the two products can coexist.
-
Relationship to Docker Machine: Installing Docker for Mac does not affect machines you created with Docker Machine. You'll get the option to copy containers and images from your local
defaultmachine (if one exists) to the new Docker for Mac HyperKit VM. -
System Requirements: Docker for Mac will launch only if all these requirements are met.
-
Mac must be a 2010 or newer model, with Intel's hardware support for memory management unit (MMU) virtualization; i.e., Extended Page Tables (EPT)
-
OS X 10.10.3 Yosemite or newer
-
At least 4GB of RAM
-
VirtualBox prior to version 4.3.30 must NOT be installed (it is incompatible with Docker for Mac)
Note: If your system does not satisfy these requirements, you can install Docker Toolbox, which uses Oracle Virtual Box instead of HyperKit.
-
-
What the install includes: The installation provides Docker Engine, Docker CLI client, Docker Compose, and Docker Machine.
Step 1. Install and Run Docker for Mac
-
Double-click
Docker.dmgto open the installer, then drag Moby the whale to the Applications folder.
You will be asked to authorize
Docker.appwith your system password during the install process. Privileged access is needed to install networking components and links to the Docker apps. -
Double-click
Docker.appto start Docker.
The whale in the top status bar indicates that Docker is running, and accessible from a terminal.

If you just installed the app, you also get a success message with suggested next steps and a link to this documentation. Click the whale (
 ) in the status bar to dismiss this popup.
-
Click the whale (
) to get Preferences, and other options.
-
Select About Docker to verify that you have the latest version.
Congratulations! You are up and running with Docker for Mac.
Step 2. Check versions of Docker Engine, Compose, and Machine
Run these commands to test if your versions of docker, docker-compose, and docker-machine are up-to-date and compatible with Docker.app.
	$ docker --version
	Docker version 1.12.0, build 8eab29e

	$ docker-compose --version
	docker-compose version 1.8.0, build f3628c7

	$ docker-machine --version
	docker-machine version 0.8.0, build b85aac1
Note: The above is an example. Your output will differ if you are running different (e.g., newer) versions.
Step 3. Explore the application and run examples
-
Open a command-line terminal, and run some Docker commands to verify that Docker is working as expected.
Some good commands to try are
docker versionto check that you have the latest release installed, anddocker psanddocker run hello-worldto verify that Docker is running. -
For something more adventurous, start a Dockerized web server.
docker run -d -p 80:80 --name webserver nginxIf the image is not found locally, Docker will pull it from Docker Hub.
In a web browser, go to
http://localhost/to bring up the home page. (Since you specified the default HTTP port, it isn't necessary to append:80at the end of the URL.)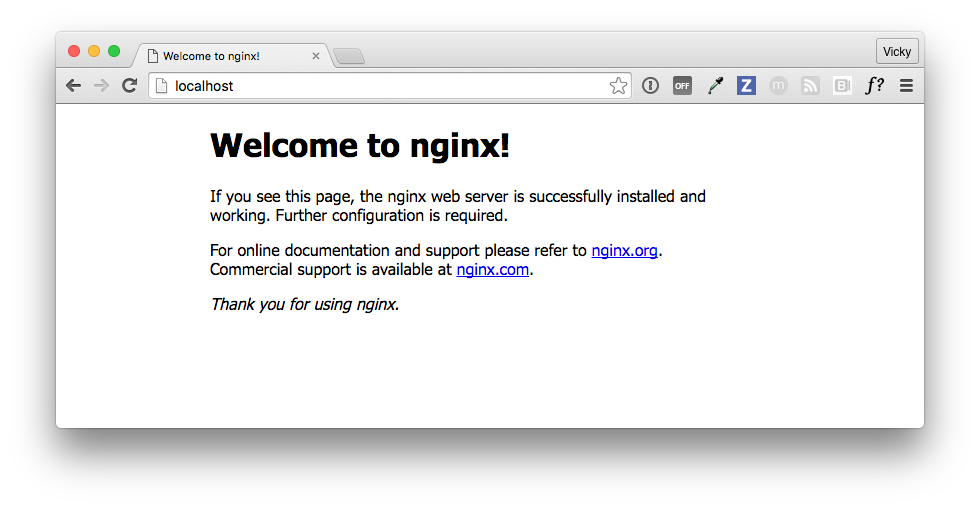
Note: Early beta releases used
dockeras the hostname to build the URL. Now, ports are exposed on the private IP addresses of the VM and forwarded tolocalhostwith no other host name set. See also, Release Notes for Beta 9.
-
Run
docker pswhile your web server is running to see details on the webserver container.CONTAINER ID IMAGE COMMAND CREATED STATUS PORTS NAMES 56f433965490 nginx "nginx -g 'daemon off" About a minute ago Up About a minute 0.0.0.0:80->80/tcp, 443/tcp webserver -
Stop or remove containers and images.
The
nginxwebserver will continue to run in the container on that port until you stop and/or remove the container. If you want to stop the webserver, type:docker stop webserverand start it again withdocker start webserver.To stop and remove the running container with a single command, type:
docker rm -f webserver. This will remove the container, but not thenginximage. You can list local images withdocker images. You might want to keep some images around so that you don't have to pull them again from Docker Hub. To remove an image you no longer need, usedocker rmi <imageID>|<imageName>. For example,docker rmi nginx.
Want more example applications? - For more example walkthroughs that include setting up services and databases in Docker Compose, see Example Applications.
Preferences
Choose --> Preferences from the menu bar. You can set the following runtime options.
General

-
Docker for Mac is set to automatically start when you log in. Uncheck the login autostart option if you don't want Docker to start when you open your session.
-
Docker for Mac is set to check for updates automatically and notify you when an update is available. If an update is found, click OK to accept and install it (or cancel to keep the current version). If you disable the check for updates, you can still find out about updates manually by choosing
-> Check for Updates -
Check Exclude VM from Time Machine backups to prevent Time Machine from backing up the Docker for Mac virtual machine.
-
CPUs - By default, Docker for Mac is set to use 2 processors. You can increase processing power for the app by setting this to a higher number, or lower it to have Docker for Mac use fewer computing resources.
-
Memory - By default, Docker for Mac is set to use
2GB runtime memory, allocated from the total available memory on your Mac. You can increase the RAM on the app to get faster performance by setting this number higher (for example to3) or lower (to1) if you want Docker for Mac to use less memory.
Advanced

-
Adding registries - As an alternative to using Docker Hub to store your public or private images or Docker Trusted Registry, you can use Docker to set up your own insecure registry. Add URLs for insecure registries and registry mirrors on which to host your images.
-
HTTP proxy settings - Docker for Mac will detect HTTP/HTTPS Proxy Settings and automatically propagate these to Docker and to your containers. For example, if you set your proxy settings to
http://proxy.example.com, Docker will use this proxy when pulling containers.
File sharing
You can decide which directories on your Mac to share with containers.
-
Add a Directory - Click
+and navigate to the directory you want to add.
-
Click Apply & Restart to make the directory available to containers using Docker's bind mount (
-v) feature.
There are some limitations on the directories that can be shared:
-
They cannot be a subdirectory of an already shared directory.
-
They cannot already exist inside of Docker.
See Namespaces in the topic on osxfs file system sharing for more information.
Privacy
You can set Docker for Mac to auto-send diagnostics, crash reports, and usage data. This information can help Docker improve the application and get more context for troubleshooting problems.
Uncheck any of the options to opt out and prevent auto-send of data. Docker may prompt for more information in some cases, even with auto-send enabled.
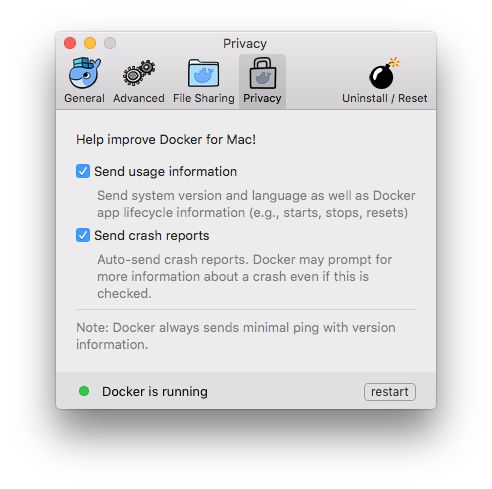
Also, you can enable or disable these auto-reporting settings with one click on the information popup when you first start Docker.

Uninstall or reset
Choose --> Preferences from the menu bar, then click Uninstall / Reset on the Preferences dialog.
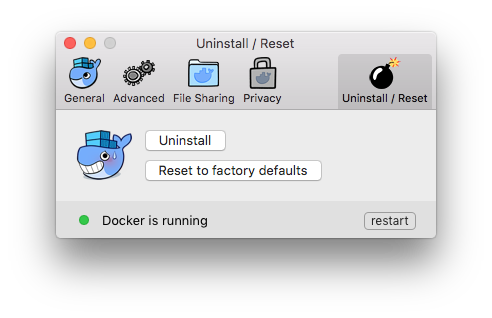
-
Uninstall - Choose this option to remove Docker for Mac from your system.
-
Reset to factory defaults - Choose this option to reset all options on Docker for Mac to its initial state, the same as when it was first installed.
You can uninstall Docker for Mac from the command line with this command: <DockerforMacPath> --uninstall. If Docker is installed in the default location, the following command will provide a clean uninstall.
$ /Applications/Docker.app/Contents/MacOS/Docker --uninstall
Docker is running, exiting...
Docker uninstalled successfully. You can move the Docker application to the trash.
You might want to use the command-line uninstall if, for example, you find that the app is non-functional, and you cannot uninstall it from the menu.
Installing bash completion
If you are using bash completion, such as homebrew bash-completion on Mac, bash completion scripts for
- docker
- docker-machine
- docker-compose may be found inside Docker.app, in the Contents/Resources/etc folder.
To activate bash completion, these files need to be copied or symlinked to your bash_completion.d directory. For example, if you use Homebrew:
cd /usr/local/etc/bash_completion.d
ln -s /Applications/Docker.app/Contents/Resources/etc/docker.bash-completion
ln -s /Applications/Docker.app/Contents/Resources/etc/docker-machine.bash-completion
ln -s /Applications/Docker.app/Contents/Resources/etc/docker-compose.bash-completion
Where to go next
-
Try out the Getting Started with Docker tutorial.
-
Dig in deeper with learn by example tutorials on on building images, running containers, networking, managing data, and storing images on Docker Hub.
-
See Example Applications for example applications that include setting up services and databases in Docker Compose.
-
Interested in trying out the new swarm mode on Docker Engine v1.12?
See Get started with swarm mode, a tutorial which includes specifics on how to leverage your Docker for Mac installation to run single and multi-node swarms.
Also, try out the Swarm examples in docker labs. Run the
bash scriptand follow the accompanying Docker Swarm Tutorial. The script uses Docker Machine to create a multi-node swarm, then walks you through various Swarm tasks and commands. -
For a summary of Docker command line interface (CLI) commands, see Docker CLI Reference Guide.
-
Check out the blog posts on Docker for Mac and Docker for Windows public betas, and earlier posts on the initial private beta.
-
Please give feedback on your experience with the app and report bugs and problems by logging into our Docker for Mac forum.
 Help improve the documentation
Email us at feedback@docker.com