10 KiB
| description | keywords | redirect_from | title | ||||||||||||||
|---|---|---|---|---|---|---|---|---|---|---|---|---|---|---|---|---|---|
| Getting Started | mac, tutorial, run, docker, local, machine |
|
Docker Desktop for Mac user manual |
The Docker Desktop for Mac user manual provides information on how to Add TLS certificates and other useful topics.
For information about Docker Desktop download, system requirements, and installation instructions, see Install Docker Desktop.
Add TLS certificates
You can add trusted Certificate Authorities (CAs) (used to verify registry server certificates) and client certificates (used to authenticate to registries) to your Docker daemon.
Add custom CA certificates (server side)
All trusted CAs (root or intermediate) are supported. Docker Desktop creates a certificate bundle of all user-trusted CAs based on the Mac Keychain, and appends it to Moby trusted certificates. So if an enterprise SSL certificate is trusted by the user on the host, it is trusted by Docker Desktop.
To manually add a custom, self-signed certificate, start by adding the certificate to the macOS keychain, which is picked up by Docker Desktop. Here is an example:
$ sudo security add-trusted-cert -d -r trustRoot -k /Library/Keychains/System.keychain ca.crt
Or, if you prefer to add the certificate to your own local keychain only (rather than for all users), run this command instead:
$ security add-trusted-cert -d -r trustRoot -k ~/Library/Keychains/login.keychain ca.crt
See also, Directory structures for certificates.
Note: You need to restart Docker Desktop after making any changes to the keychain or to the
~/.docker/certs.ddirectory in order for the changes to take effect.
For a complete explanation of how to do this, see the blog post Adding Self-signed Registry Certs to Docker & Docker Desktop for Mac{:target="blank" rel="noopener" class=""}.
Add client certificates
You can put your client certificates in
~/.docker/certs.d/<MyRegistry>:<Port>/client.cert and
~/.docker/certs.d/<MyRegistry>:<Port>/client.key.
When the Docker Desktop application starts, it copies the ~/.docker/certs.d
folder on your Mac to the /etc/docker/certs.d directory on Moby (the Docker
Desktop xhyve virtual machine).
You need to restart Docker Desktop after making any changes to the keychain or to the
~/.docker/certs.ddirectory in order for the changes to take effect.The registry cannot be listed as an insecure registry (see Docker Engine. Docker Desktop ignores certificates listed under insecure registries, and does not send client certificates. Commands like
docker runthat attempt to pull from the registry produce error messages on the command line, as well as on the registry.
Directory structures for certificates
If you have this directory structure, you do not need to manually add the CA certificate to your Mac OS system login:
/Users/<user>/.docker/certs.d/
└── <MyRegistry>:<Port>
   ├── ca.crt
   ├── client.cert
   └── client.key
The following further illustrates and explains a configuration with custom certificates:
/etc/docker/certs.d/        <-- Certificate directory
└── localhost:5000          <-- Hostname:port
   ├── client.cert          <-- Client certificate
   ├── client.key           <-- Client key
   └── ca.crt               <-- Certificate authority that signed
                                the registry certificate
You can also have this directory structure, as long as the CA certificate is also in your keychain.
/Users/<user>/.docker/certs.d/
└── <MyRegistry>:<Port>
    ├── client.cert
    └── client.key
To learn more about how to install a CA root certificate for the registry and how to set the client TLS certificate for verification, see Verify repository client with certificates in the Docker Engine topics.
Install shell completion
Docker Desktop comes with scripts to enable completion for the docker and docker-compose commands. The completion scripts may be
found inside Docker.app, in the Contents/Resources/etc/ directory and can be
installed both in Bash and Zsh.
Bash
Bash has built-in support for
completion{:target="blank"
class=""} To activate completion for Docker commands, these files need to be
copied or symlinked to your bash_completion.d/ directory. For example, if you
installed bash via Homebrew:
etc=/Applications/Docker.app/Contents/Resources/etc
ln -s $etc/docker.bash-completion $(brew --prefix)/etc/bash_completion.d/docker
ln -s $etc/docker-compose.bash-completion $(brew --prefix)/etc/bash_completion.d/docker-compose
Add the following to your ~/.bash_profile:
[ -f /usr/local/etc/bash_completion ] && . /usr/local/etc/bash_completion
OR
if [ -f $(brew --prefix)/etc/bash_completion ]; then
. $(brew --prefix)/etc/bash_completion
fi
Zsh
In Zsh, the completion
system{:target="blank" rel="nooopener" class=""}
takes care of things. To activate completion for Docker commands,
these files need to be copied or symlinked to your Zsh site-functions/
directory. For example, if you installed Zsh via Homebrew{:target="blank" rel="nooopener" class=""}:
etc=/Applications/Docker.app/Contents/Resources/etc
ln -s $etc/docker.zsh-completion /usr/local/share/zsh/site-functions/_docker
ln -s $etc/docker-compose.zsh-completion /usr/local/share/zsh/site-functions/_docker-compose
Fish-Shell
Fish-shell also supports tab completion completion
system{:target="blank"
class=""}. To activate completion for Docker commands,
these files need to be copied or symlinked to your Fish-shell completions/
directory.
Create the completions directory:
$ mkdir -p ~/.config/fish/completions
Now add fish completions from docker.
$ ln -shi /Applications/Docker.app/Contents/Resources/etc/docker.fish-completion ~/.config/fish/completions/docker.fish
$ ln -shi /Applications/Docker.app/Contents/Resources/etc/docker-compose.fish-completion ~/.config/fish/completions/docker-compose.fish
Docker Hub
Select Sign in /Create Docker ID from the Docker Desktop menu to access your Docker Hub{: target="blank" rel="noopener" class="" } account. Once logged in, you can access your Docker Hub repositories and organizations directly from the Docker Desktop menu.
For more information, refer to the following Docker Hub topics{:target="blank" class=""}:
- Organizations and Teams in Docker Hub{:target="blank" rel="noopener" class=""}
- Builds{:target="blank" rel="noopener" class=""}
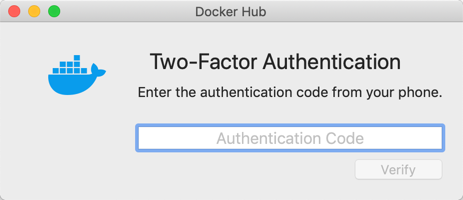
Two-factor authentication
Docker Desktop enables you to sign into Docker Hub using two-factor authentication. Two-factor authentication provides an extra layer of security when accessing your Docker Hub account.
You must enable two-factor authentication in Docker Hub before signing into your Docker Hub account through Docker Desktop. For instructions, see Enable two-factor authentication for Docker Hub.
After you have enabled two-factor authentication:
-
Go to the Docker Desktop menu and then select Sign in / Create Docker ID.
-
Enter your Docker ID and password and click Sign in.
-
After you have successfully signed in, Docker Desktop prompts you to enter the authentication code. Enter the six-digit code from your phone and then click Verify.
 {:width="500px"}
After you have successfully authenticated, you can access your organizations and repositories directly from the Docker Desktop menu.
Pause/Resume
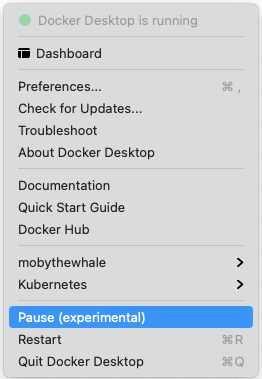
Starting with the Docker Desktop 4.2 release, you can pause your Docker Desktop session when you are not actively using it and save CPU resources on your machine. When you pause Docker Desktop, the Linux VM running Docker Engine is paused, the current state of all your containers are saved in memory, and all processes are frozen. This reduces the CPU usage and helps you retain a longer battery life on your laptop. You can resume Docker Desktop when you want by clicking the Resume option.
From the Docker menu, select  {: .inline} > Pause to pause Docker Desktop.
 {:width="250px"}
Docker Desktop now displays the paused status on the Docker menu and on the Containers / Apps, Images, Volumes, and Dev Environment screens on the Docker Dashboard. You can still access the Preferences and the Troubleshoot menu from the Dashboard when you've paused Docker Desktop.
Select {: .inline} > Resume to resume Docker Desktop.
Note
When Docker Desktop is paused, running any commands in the Docker CLI will automatically resume Docker Desktop.
Where to go next
-
Try out the walkthrough at Get Started{: target="blank" class=""}.
-
Dig in deeper with Docker Labs example walkthroughs and source code.
-
For a summary of Docker command line interface (CLI) commands, see Docker CLI Reference Guide{: target="blank" rel="noopener" class=""}.
-
Check out the blog post, What’s New in Docker 17.06 Community Edition (CE){: target="blank" rel="noopener" class=""}.