8.8 KiB
Manage and authorize UCP users
This page explains how to manage users and authorize users within the UCP. Managing users requires that you understand how to create users and combine them into teams. Authorizing users requires that you understand how to apply roles and create permissions within UCP. On this page, you learn to do both. You also learn about the features and systems of UCP that support user management and authorization.
Understand user authorization
Users in UCP have two levels of authorization. They may have authorization to manage UCP and they have authorization to access the Docker objects and resources that UCP manages. You can authorize user to UCP manage UCP by enabling the IS A UCP ADMIN in a user's Account Details.
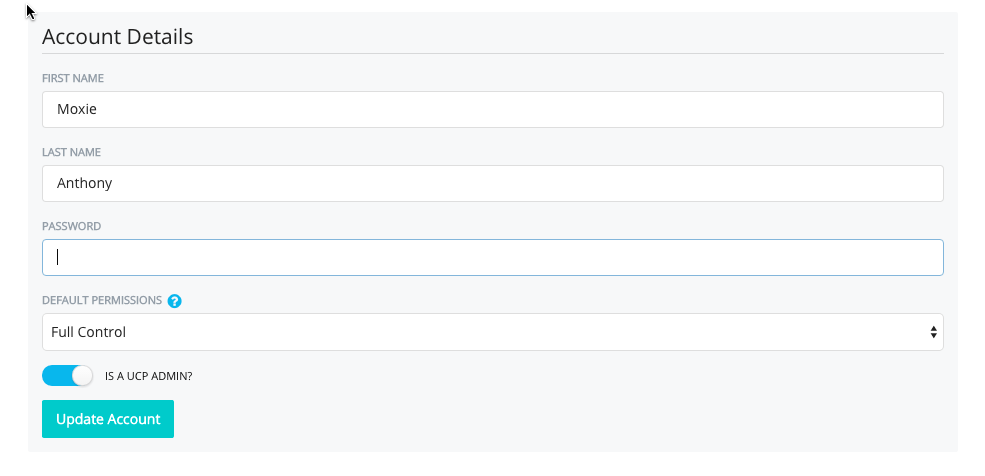
Users that are UCP administrators have authorization to fully access all Docker objects in your production system. This authorization is the granted both whether access is through the GUI or the command line.
Users within UCP have permissions assigned to them by default. This authorizes what a user can do to Docker resource such as volumes, networks, images, and containers. UCP allows you define default permissions for a user when you create that user. In this release of UCP, more granular access to just one object, the container object, is possible through the use of teams.
The possible permissions are:
| Type | Description |
|---|---|
| No Access | Cannot access any resources. |
| View Only | Can view resources. This role grants the ability to view a container but not restart, kill, or remove it. |
| Restricted Control | Can edit resources. This role grants the ability to create, restart, kill, and remove containers. |
| Full Control | Can do anything possible to resources. This role grants full rights to all actions on containers. |
For containers only, you can extend the default access permissions with more granular, role-based permissions. Docker Engine allows container creators to apply arbitrary, descriptive strings called labels to a container. If you define labels for use by container creators, you can leverage these labels with UCP teams to configure role-based access to containers.
The general process for configuring role-based access to containers is:
- Identify one or more labels to apply to containers.
- Create one or more teams.
- Define a permission by combining a pre-identified label with a role value.
- Add users to the team.
- Ensure container creators use the pre-defined labels.
Once you configure it, users have this access through UCP and through their interactions on the command line via the client bundle.
Note: Users can by-pass all UCP authorization controls by logging into a UCP node via standard SSH and addressing the Swarm cluster directly. For this reason, You must be sure to secure network access to a cluster's nodes.
Understand restricted control
Containers run as services on your network. Without proper knowledge, users can launch a container with an insecure configuration. To reduce the risk of this happening, the Restricted Control limits the options users can use when launching containers.
A user with Restricted Control can create, restart, kill, or remove a
container. These users are can not docker exec into a container. Additionally,
Restricted Control prevents users from running a container with these
options:
| Prevented Option | Description |
|---|---|
--privileged |
A “privileged” container is given access to all devices. |
--cap-add |
The ability to expand the kernel-level capabilities a user or process has in a container. |
| host mounted volumes | Mount a volume from the host where the container is running. |
--ipc |
The ability to set a container's IPC (POSIX/SysV IPC) namespace mode. This provides separation of named shared memory segments, semaphores and message queues. mode |
--pid |
PID namespace provides separation of processes. The PID Namespace removes the view of the system processes, and allows process ids to be reused including pid 1. |
Users that attempt to create containers with these options receive an error message.
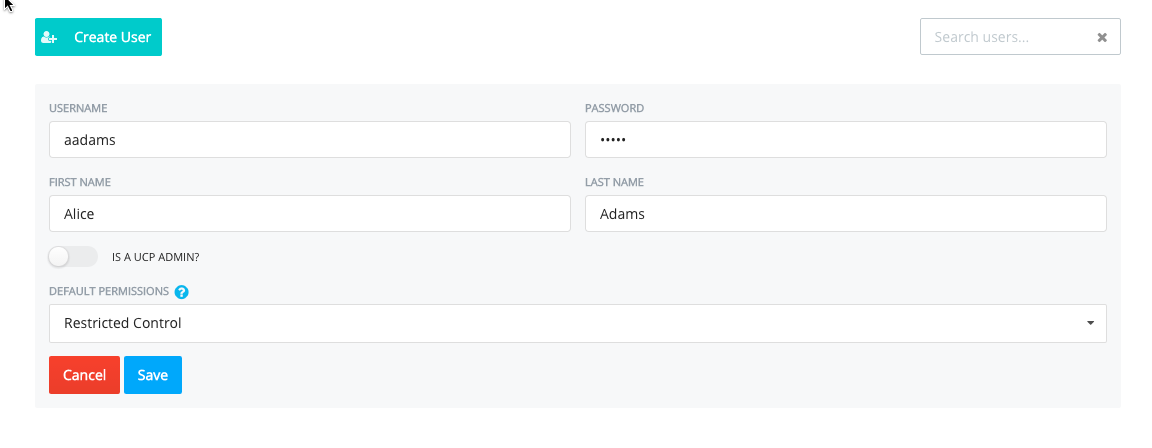
Creating users on UCP
UCP offers two ways to create user accounts. You can manually create accounts one-at-a-time or you can import users as a group into a team via UCP's LDAP integration. To create an individual user, do the following:
-
Click Users & Teams from the UCP dashboard.
-
Click Create User.
-
Complete the fields for the user.
The DEFAULT PERMISSIONS define the default access role a user has to all the Docker objects and resources in the system. You can refine and extend access on containers by adding a user to a Team later.
-
Click Save to create the user.
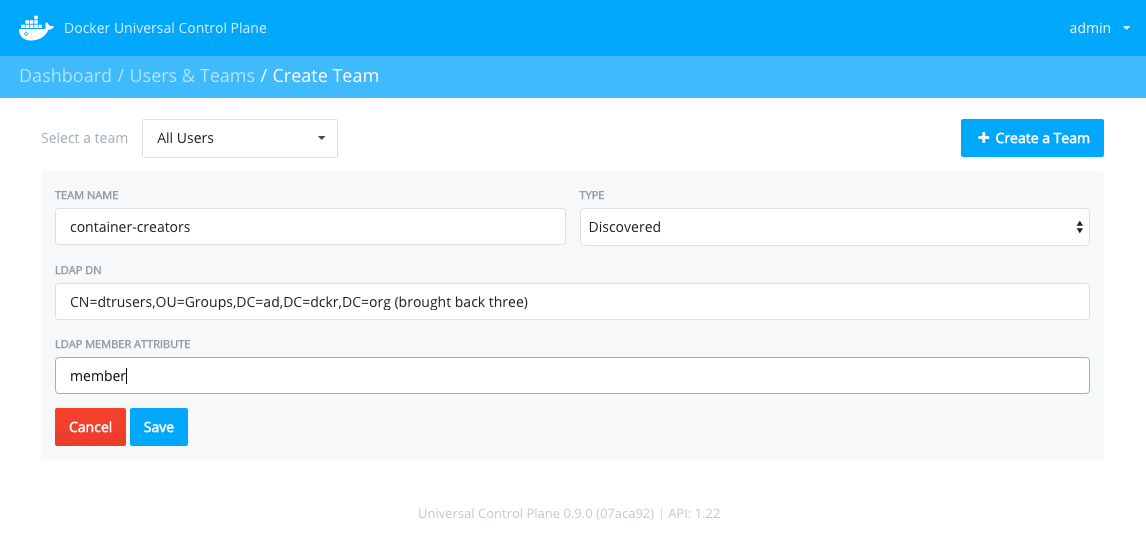
Creating a team
UCP offers two ways to create teams. You can manually create teams one-at-a-time or you can populate a team by importing multiple users via an LDAP or Active Directory connection. The teams you populate one-at-a-time are Managed teams meaning they contain only users managed by UCP.
Teams you create via an LDAP or Active Directory connection are known as Discovered teams. To use LDAP or Active Directory, you must have already configured the AUTH settings in UCP. When you create a Discovered team, the system imports the members and applies the default authorization set in UCP's AUTH settings. The value appears in the DEFAULT PERMISSIONS FOR NEW DISCOVERED ACCOUNTS field.

To create Discovered team with LDAP or Active Directory, do the following:
-
Login into UCP as a user with UCP ADMIN authorization.
-
Click Users & Teams from the UCP dashboard.
-
Click Create a Team.
The system displays the Create Team page. At this point, you decide what TYPE of team you want to create. You can't change or convert the team TYPE later.
-
Choose Discovered from the TYPE dropdown.
The system displays options for the Discovered team. Completing this dialog requires that you have a basic understanding of LDAP or access to someone who does.
-
Enter a Name for the team.
-
Enter an LDAP DN value.
This value is a distinguished name (DN) identify the group you want to import. A distinguished name describes a position in an LDAP directory information tree (DIT).
-
Enter a LDAP MEMBER ATTRIBUTE value.
This identifies the attribute you should use to retrieve the values.
-
Save the team.
After a moment, the system creates a team with the users matching your team specification.
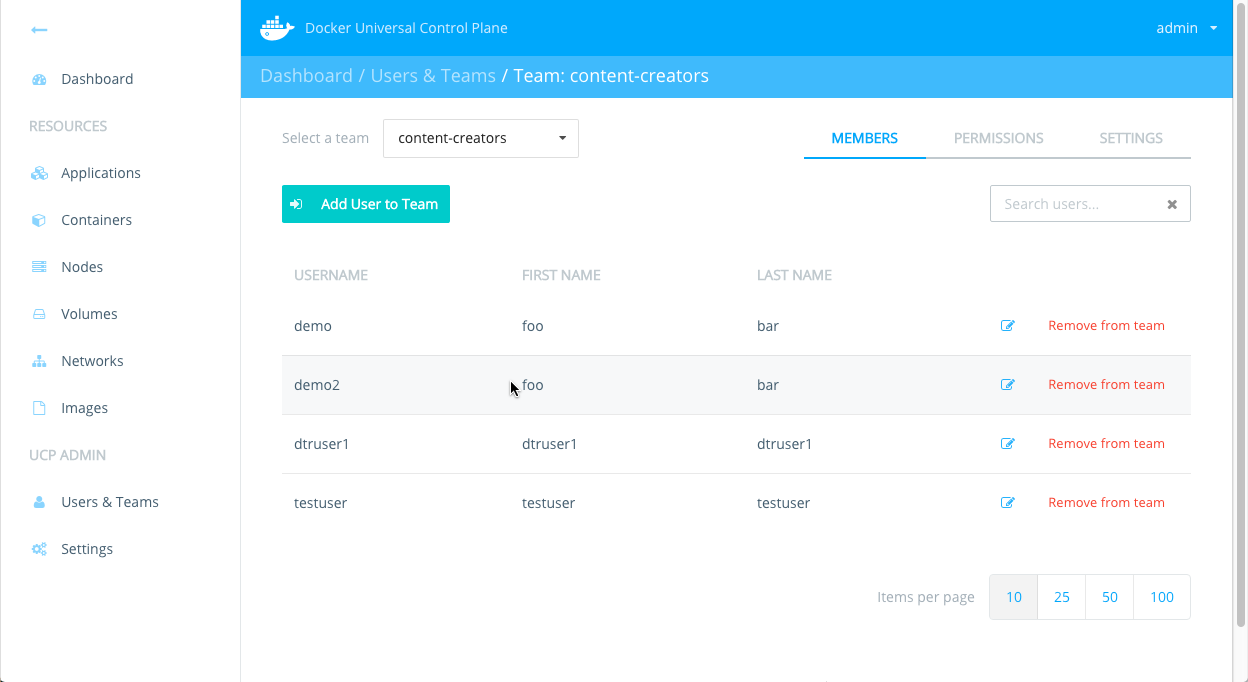
Add permissions to a team
You can use a team to simply organize Managed users or to import/organize Discovered users. Optionally, you can also add permissions to a the team. Permissions are a combination of labels and roles you can apply to a team. Permissions authorize users to act on containers with the matching labels according to roles you define.
Note: For correct application, you must ensure the labels exist on containers deployed ins UCP.
To add Permissions to a team, do the following:
-
Select the team.
-
Choose PERMISSIONS.
-
Click Add Label.

- Click Save.
Related information
To learn how to apply labels, see the how to Apply custom metadata Engine documentation.