mirror of https://github.com/kubeflow/examples.git
46 lines
2.3 KiB
Markdown
46 lines
2.3 KiB
Markdown
# End-to-End kubeflow tutorial using a Pytorch model in Google Cloud
|
||
|
||
This example demonstrates how you can use `kubeflow` end-to-end to train and
|
||
serve a distributed Pytorch model on a kubernetes cluster in GCP. This
|
||
tutorial is based upon the below projects:
|
||
- [DDP training CPU and GPU in Pytorch-operator example](https://github.com/kubeflow/pytorch-operator/tree/master/examples/ddp/mnist)
|
||
- [Google Codelabs - "Introduction to Kubeflow on Google Kubernetes Engine"](https://github.com/googlecodelabs/kubeflow-introduction)
|
||
- [IBM FfDL - PyTorch MNIST Classifier](https://github.com/IBM/FfDL/tree/master/community/FfDL-Seldon/pytorch-model)
|
||
## Goals
|
||
|
||
There are two primary goals for this tutorial:
|
||
|
||
* Demonstrate an End-to-End kubeflow example
|
||
* Present an End-to-End Pytorch model
|
||
|
||
By the end of this tutorial, you should learn how to:
|
||
|
||
* Setup a Kubeflow cluster on a new Kubernetes deployment
|
||
* Spawn up a shared-persistent storage across the cluster to store models
|
||
* Train a distributed model using Pytorch and GPUs on the cluster
|
||
* Serve the model using [Seldon Core](https://github.com/SeldonIO/seldon-core/)
|
||
* Query the model from a simple front-end application
|
||
|
||
## The model and the data
|
||
|
||
This tutorial trains a TensorFlow model on the MNIST dataset, which is the hello world for machine learning.
|
||
|
||
The MNIST dataset contains a large number of images of hand-written digits in the range 0 to 9, as well as the labels identifying the digit in each image.
|
||
|
||
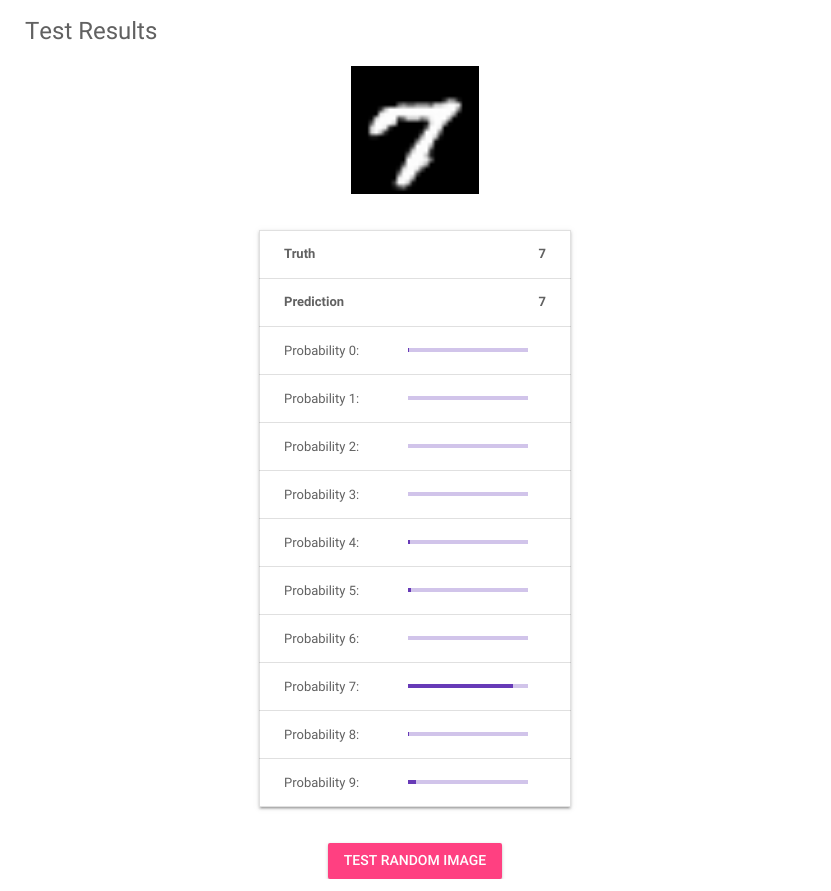
After training, the model classifies incoming images into 10 categories (0 to 9) based on what it’s learned about handwritten images.
|
||
In other words, you send an image to the model, and the model does its best to identify the digit shown in the image.
|
||
|
||
|
||
|
||
In the above screenshot, the image shows a hand-written 7.
|
||
The table below the image shows a bar graph for each classification label from 0 to 9. Each bar represents the probability that the image matches the respective label.
|
||
Looks like it’s pretty confident this one is an 7!
|
||
|
||
## Steps:
|
||
|
||
1. [Setup a Kubeflow cluster](01_setup_a_kubeflow_cluster.md)
|
||
1. [Distributed Training using DDP and PyTorchJob](02_distributed_training.md)
|
||
1. [Serving the model](03_serving_the_model.md)
|
||
1. [Querying the model](04_querying_the_model.md)
|
||
1. [Teardown](05_teardown.md)
|