12 KiB
| title |
|---|
| Multi Cluster Delivery |
This section introduces how you deploy Helm Chart into multi-environments and clusters. Before start, make sure you have learned the basic helm chart delivery along with all addon enabled.
Prepare Clusters
This section is preparation for multi-cluster, we will start from scratch for convenience. if you already have multi-clusters joined, you can skip this section.
- Install KubeVela control plane with velad
velad install
- Export the KubeConfig for the newly created cluster
export KUBECONFIG=$(velad kubeconfig --name default --host)
- Enable velaux addon for UI console
vela addon enable velaux
- Create a cluster with velad named
foo
velad install --name foo --cluster-only
- Join the created cluster to control plane
vela cluster join $(velad kubeconfig --name foo --internal) --name foo
- Enable fluxcd addon for helm component
vela addon enable fluxcd
If you have already enabled the fluxcd addon before you joined the new cluster, you should enable the addon for the newly joined cluster by:
vela addon enable fluxcd --clusters foo
Finally, we have finished all preparation, you can check the clusters joined:
$ vela cluster ls
CLUSTER	ALIAS	TYPE           	ENDPOINT               	ACCEPTED	LABELS
local  	     	Internal       	-                      	true
foo    	     	X509Certificate	https://172.20.0.6:6443	true
One cluster named local is the KubeVela control plane, another one named foo is the cluster we just joined.
Deploy across multi clusters
The basic mechanism for multi cluster delivery is almost the same with deploy container image.
We can use topology policy to specify the delivery topology for helm chart like the following command:
cat <<EOF | vela up -f -
apiVersion: core.oam.dev/v1beta1
kind: Application
metadata:
  name: helm-hello
spec:
  components:
    - name: hello
      type: helm
      properties:
        repoType: "helm"
        url: "https://jhidalgo3.github.io/helm-charts/"
        chart: "hello-kubernetes-chart"
        version: "3.0.0"
  policies:
    - name: foo-cluster-only
      type: topology
      properties:
        clusters: ["foo"]
EOF
The clusters field of topology policy is a slice, you can specify multiple cluster names here.
You can also use label selector or specify namespace with that, refer to the reference docs for more details.
After deployed, you can check the deployed application by:
vela status helm-hello
The expected output should be as follows if deployed successfully:
About:

  Name:      	helm-hello
  Namespace: 	default
  Created at:	2022-06-09 19:14:57 +0800 CST
  Status:    	running

Workflow:

  mode: DAG
  finished: true
  Suspend: false
  Terminated: false
  Steps
  - id:vtahj5zrz4
    name:deploy-foo-cluster-only
    type:deploy
    phase:succeeded
    message:

Services:

  - Name: hello
    Cluster: foo  Namespace: default
    Type: helm
    Healthy Fetch repository successfully, Create helm release successfully
    No trait applied
You can check the deployed resource by:
$ vela status helm-hello --tree
CLUSTER       NAMESPACE     RESOURCE             STATUS
foo       ─── default   ─┬─ HelmRelease/hello    updated
                         └─ HelmRepository/hello updated
You can also check the deployed resource by VelaUX, it's already introduced in the basic helm delivery docs.
Deploy with override configurations
In some cases, we will deploy helm chart into different clusters with different values, then we can use the override policy.
Below is a complex example that we will deploy one helm chart into two clusters and specify different values for each cluster. Let's deploy it:
cat <<EOF | vela up -f -
apiVersion: core.oam.dev/v1beta1
kind: Application
metadata:
  name: helm-hello
spec:
  components:
    - name: hello
      type: helm
      properties:
        repoType: "helm"
        url: "https://jhidalgo3.github.io/helm-charts/"
        chart: "hello-kubernetes-chart"
        version: "3.0.0"
  policies:
    - name: topology-local
      type: topology
      properties:
        clusters: ["local"]
    - name: topology-foo
      type: topology
      properties:
        clusters: ["foo"]
    - name: override-local
      type: override
      properties:
        components:
          - name: hello
            properties:
              values:
                configs:
                  MESSAGE: Welcome to Control Plane Cluster!
    - name: override-foo
      type: override
      properties:
        components:
          - name: hello
            properties:
              values:
                configs:
                  MESSAGE: Welcome to Your New Foo Cluster!
  workflow:
    steps:
      - name: deploy2local
        type: deploy
        properties:
          policies: ["topology-local", "override-local"]
      - name: manual-approval
        type: suspend
      - name: deploy2foo
        type: deploy
        properties:
          policies: ["topology-foo", "override-foo"]
EOF
Note: If you feel the policy and workflow is a bit complex, you can make them as an external object and just reference the object, the usage is the same with the container delivery.
The deploy process has three steps: 1) deploy to local cluster; 2) wait for manual approval; 3) deploy to foo cluster. So you will find it was suspended after the first step, just like follows:
$ vela status helm-hello
About:

  Name:      	helm-hello
  Namespace: 	default
  Created at:	2022-06-09 19:38:13 +0800 CST
  Status:    	workflowSuspending

Workflow:

  mode: StepByStep
  finished: false
  Suspend: true
  Terminated: false
  Steps
  - id:ww4cydlvee
    name:deploy2local
    type:deploy
    phase:succeeded
    message:
  - id:xj6hu97e1e
    name:manual-approval
    type:suspend
    phase:succeeded
    message:

Services:

  - Name: hello
    Cluster: local  Namespace: default
    Type: helm
    Healthy Fetch repository successfully, Create helm release successfully
    No trait applied
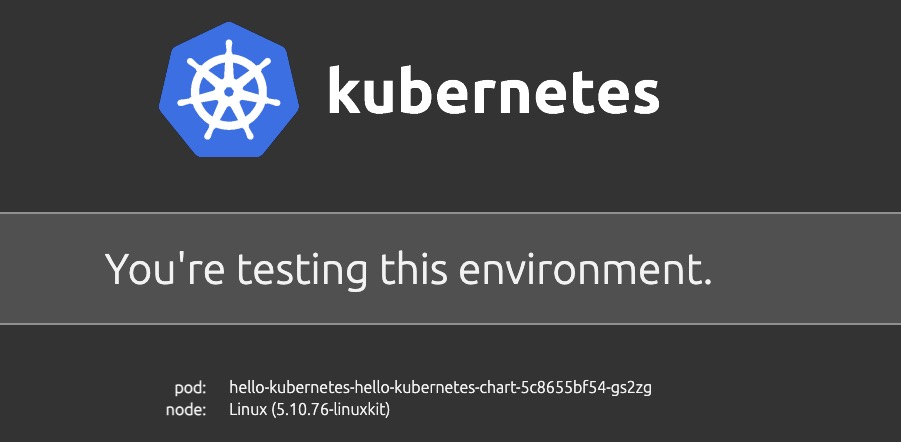
You can check the helm chart deployed in control plane with the value "Welcome to Control Plane Cluster!".
vela port-forward helm-hello
It will automatically prompt with your browser with the following page:

Let's continue the workflow as we have checked the deployment has succeeded.
vela workflow resume helm-hello
Then it will deploy to the foo cluster, you can check the resources with detailed information:
$ vela status helm-hello --tree --detail
CLUSTER       NAMESPACE     RESOURCE             STATUS    APPLY_TIME          DETAIL
foo       ─── default   ─┬─ HelmRelease/hello    updated   2022-06-09 19:38:13 Ready: True  Status: Release reconciliation succeeded  Age: 64s
                         └─ HelmRepository/hello updated   2022-06-09 19:38:13 URL: https://jhidalgo3.github.io/helm-charts/  Age: 64s  Ready: True
                                                                               Status: stored artifact for revision 'ab876069f02d779cb4b63587af1266464818ba3790c0ccd50337e3cdead44803'
local     ─── default   ─┬─ HelmRelease/hello    updated   2022-06-09 19:38:13 Ready: True  Status: Release reconciliation succeeded  Age: 7m34s
                         └─ HelmRepository/hello updated   2022-06-09 19:38:13 URL: https://jhidalgo3.github.io/helm-charts/  Age: 7m34s  Ready: True
                                                                               Status: stored artifact for revision 'ab876069f02d779cb4b63587af1266464818ba3790c0ccd50337e3cdead44803'
Use port forward again:
vela port-forward helm-hello
Then it will prompt some selections:
? You have 2 deployed resources in your app. Please choose one:  [Use arrows to move, type to filter]
> Cluster: foo | Namespace: default | Kind: HelmRelease | Name: hello
  Cluster: local | Namespace: default | Kind: HelmRelease | Name: hello
Choose the option with cluster foo, then you'll see the result that has was overridden with new message.
$ curl http://127.0.0.1:8080/
...snip...
      <div id="message">
  Welcome to Your New Foo Cluster!
</div>
...snip...
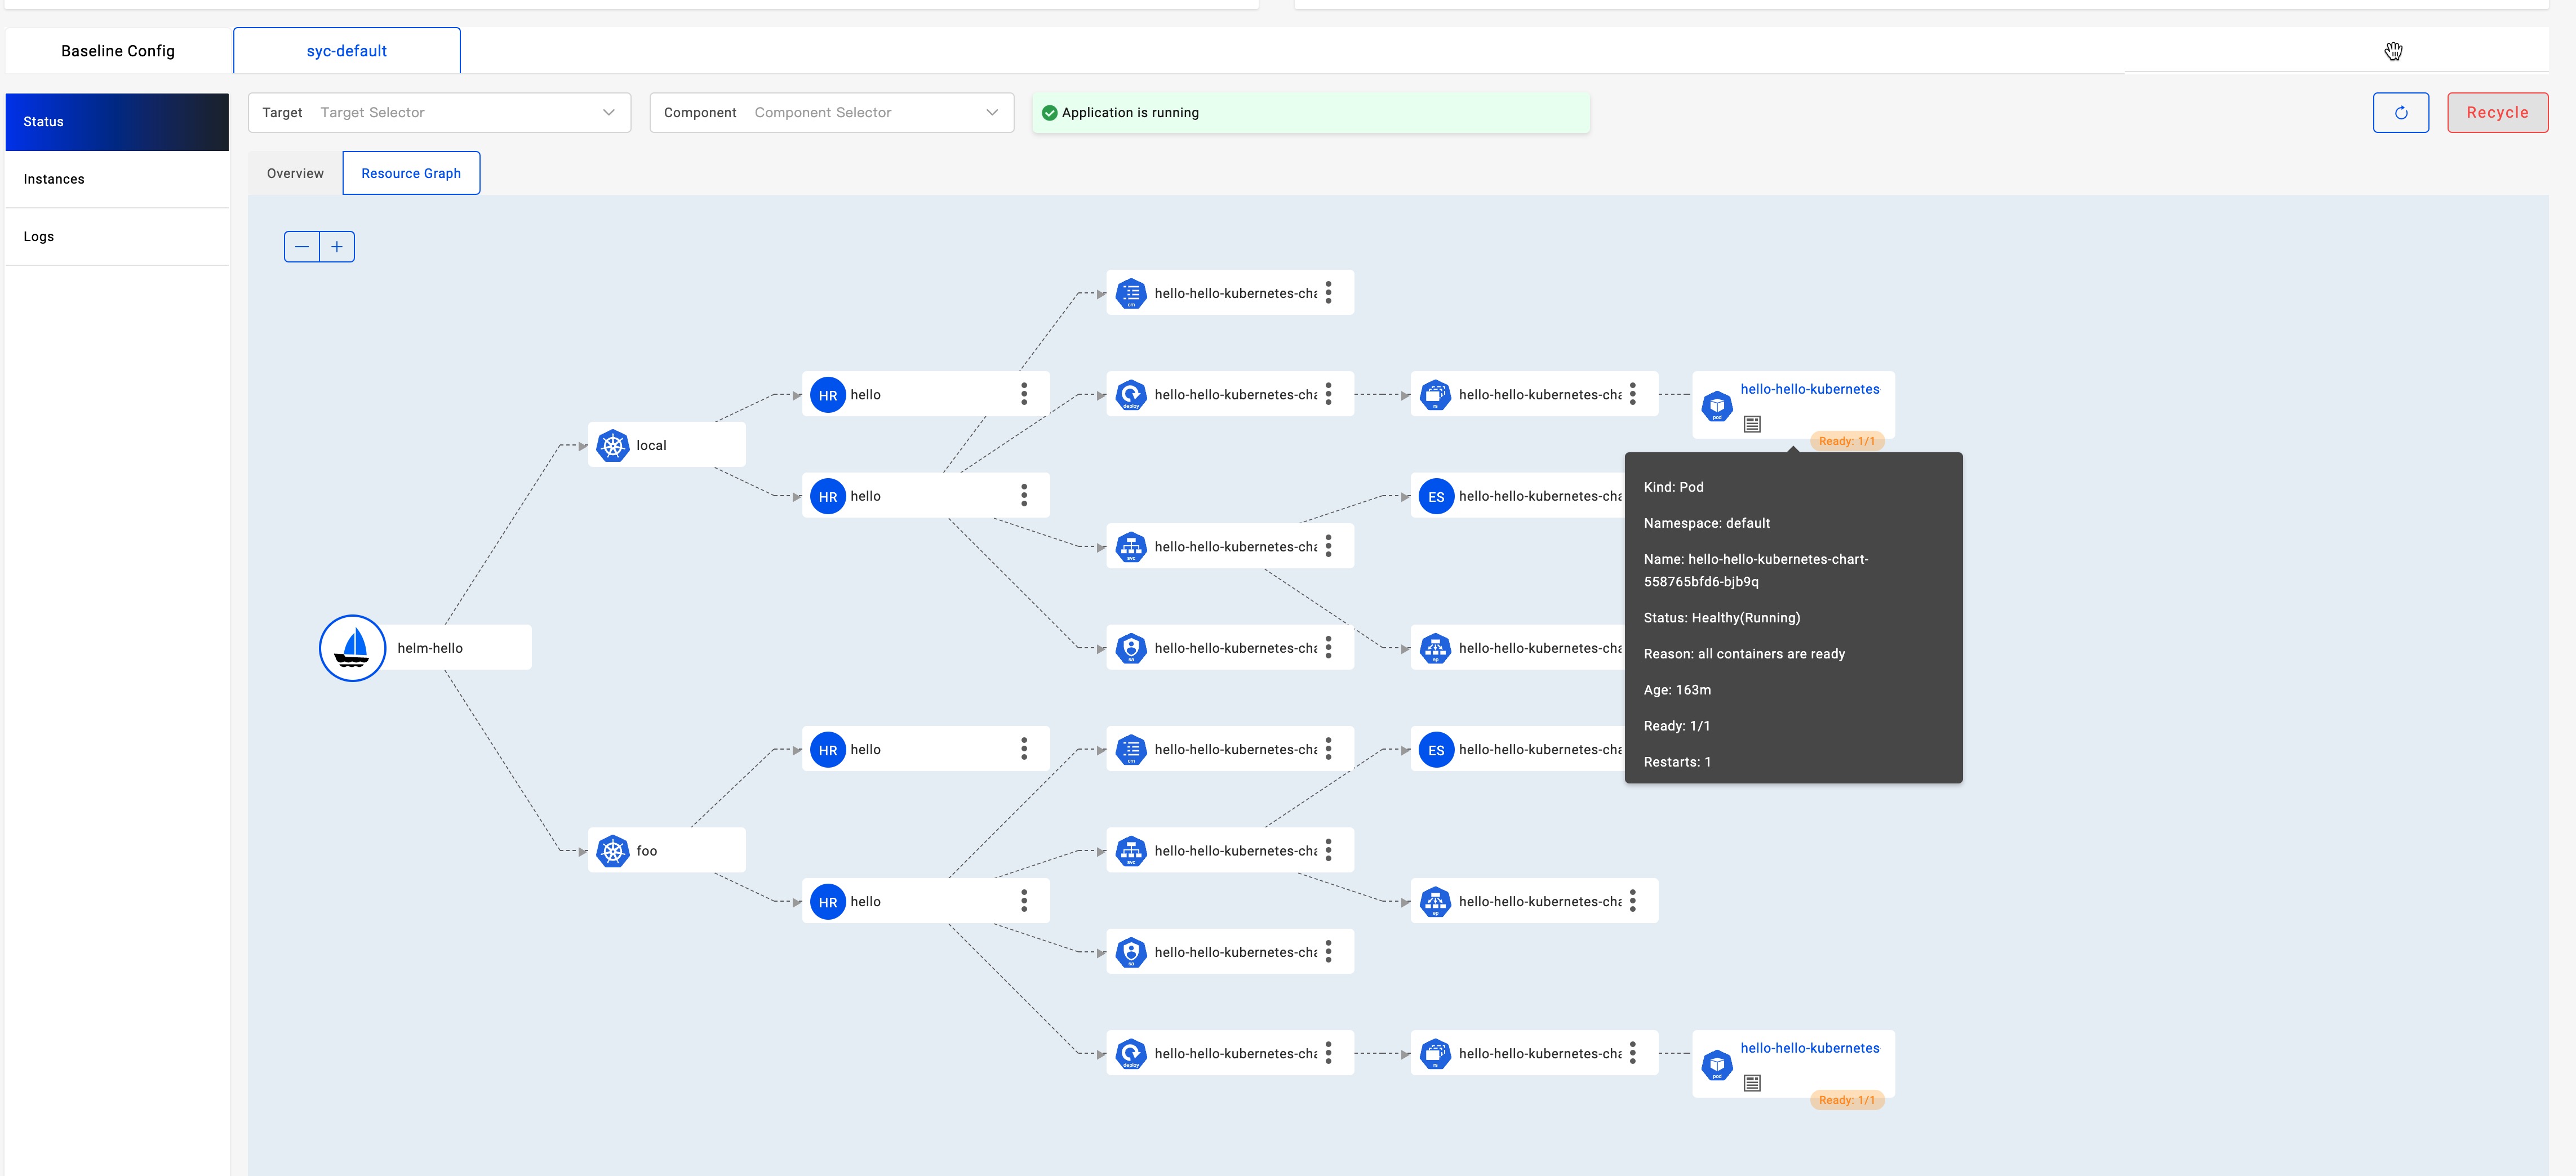
More from UI console
If you're using the velaux UI console, you can get even more information with a unified experience for multi clusters.
- Check pod status and event from different clusters:

- Check pod logs from different clusters:

- Check resource topology and status:
Specify different value file for different environment
You can choose different value file present in a helm chart for different environment. eg:
Please make sure your local cluster have two namespaces "test" and "prod" which represent two environments in our example.
We use the chart hello-kubernetes-chart as an example.This chart has two values files. You can pull this chart and have a look all contains files in it:
$ tree ./hello-kubernetes-chart
./hello-kubernetes-chart
├── Chart.yaml
├── templates
│ ├── NOTES.txt
│ ├── _helpers.tpl
│ ├── config-map.yaml
│ ├── deployment.yaml
│ ├── hpa.yaml
│ ├── ingress.yaml
│ ├── service.yaml
│ ├── serviceaccount.yaml
│ └── tests
│ └── test-connection.yaml
├── values-production.yaml
└── values.yaml
As we can see, there are values files values.yaml values-production.yaml in this chart.
cat <<EOF | vela up -f -
apiVersion: core.oam.dev/v1beta1
kind: Application
metadata:
  name: hello-kubernetes
spec:
  components:
    - name: hello-kubernetes
      type: helm
      properties:
        repoType: "helm"
        url: "https://wangyikewxgm.github.io/my-charts/"
        chart: "hello-kubernetes-chart"
        version: "0.1.0"

  policies:
    - name: topology-test
      type: topology
      properties:
        clusters: ["local"]
        namespace: "test"
    - name: topology-prod
      type: topology
      properties:
        clusters: ["local"]
        namespace: "prod"
    - name: override-prod
      type: override
      properties:
        components:
          - name: hello-kubernetes
            properties:
              valuesFiles:
                - "values-production.yaml"
  workflow:
    steps:
      - name: deploy2test
        type: deploy
        properties:
          policies: ["topology-test"]
      - name: deploy2prod
        type: deploy
        properties:
          policies: ["topology-prod", "override-prod"]
EOF
Access the endpoints of application:
vela port-forward hello-kubernetes
If you choose Cluster: local | Namespace: test | Kind: HelmRelease | Name: hello-kubernetes you will see:
If you choose Cluster: local | Namespace: prod | Kind: HelmRelease | Name: hello-kubernetes you will see:

Clean up
If you're using velad for this demo, you can clean up very easily by:
- Clean up the foo cluster
velad uninstall -n foo
- Clean up the default cluster
velad uninstall
Happy shipping with Helm chart!